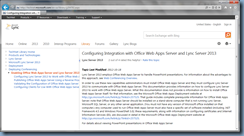
First off, I’ve been asked by a few ex-colleagues about where the Office Web Apps documentation is because it doesn’t look like it’s included in the Lync Server 2013 RTM documents and the answer to this is that the information is actually bundled into the Office TechNet library:
https://technet.microsoft.com/en-us/library/jj204792.aspx
What this documentation does not provide is information on how to install Office Web Apps Server itself; for that information, see the Microsoft Office Web Apps Deployment website at https://go.microsoft.com/fwlink/p/?linkid=257525.
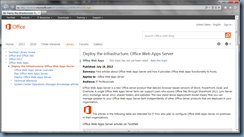
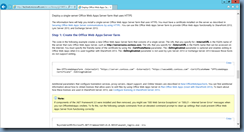
Clicking on the URL: https://go.microsoft.com/fwlink/p/?linkid=257525 will bring you to the Office library shown here:
https://technet.microsoft.com/en-us/library/jj219458(office.15).aspx
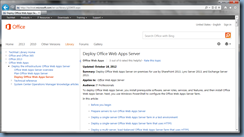
… and the section we’re interested in is the following:
Deploy Office Web Apps Server
https://technet.microsoft.com/en-us/library/jj219455.aspx
Staging Servers and Install Prerequisites
For this demonstration, I’ll be deploying a new Office Web Apps server on a Windows Server 2012 server (for the installation on Windows Server 2008 R2, see my previous post @: https://blog.terenceluk.com/deploying-office-web-apps-server-for/)
Note the following restrictions on where and what you can and cannot install onto the Office Web Apps Server:
Office Web Apps Server should be installed on a stand-alone computer that is not running Lync Server, Microsoft SQL Server, or any other server application. (You must not have any version of Microsoft office installed on that computer.)
Install Prerequisites:
Unlike Windows Server 2008 R2, you won’t need to download additional packages to be installed so proceed with the next step to install roles and features.
Install Windows Roles and Features:
Rather than manually going through Server Manager to install the roles and features, the following PowerShell cmdlets can be used to automatically install all of them.
Add-WindowsFeature Web-Server,Web-Mgmt-Tools,Web-Mgmt-Console,Web-WebServer,Web-Common-Http,Web-Default-Doc,Web-Static-Content,Web-Performance,Web-Stat-Compression,Web-Dyn-Compression,Web-Security,Web-Filtering,Web-Windows-Auth,Web-App-Dev,Web-Net-Ext45,Web-Asp-Net45,Web-ISAPI-Ext,Web-ISAPI-Filter,Web-Includes,InkandHandwritingServices
Restart the server when the cmdlet completes.
Download and Install Office Web Apps Server
Download Office Web Apps Server:
Download the installation binary from the following URL:
https://www.microsoft.com/en-us/download/details.aspx?id=35489
- wacserver.img – 385.6MB
Install Office Web Apps Server:
Use an application such as WinRAR to extra the files from the IMG image and then run setup.exe:
Download and Install language packs for Office Web Apps Server:
Once Office Web Apps Server has been installed, proceed with downloading the language packs here:
https://www.microsoft.com/en-us/download/details.aspx?id=35490
- wacserverlanguagepack.exe – 25.6 MB
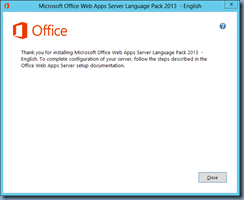
Then install it onto the server:
Configuring the Office Web Apps Server
Request a new certificate for the Office Web Apps Server:
There are several ways to generate an SSL certificate and which one to use doesn’t really matter. I used to always use the built in certificate tool in OCS 2007 for generating certificates is but the tool in Lync Server 2013’s Deployment Wizard automatically puts in SAN entries which means I’ll have additional names in the certificate that I wouldn’t want. Instead, the alternative is to use the /certsrv webpage to manually request a certificate from your internal CA, install it onto the user store, export it and reinstall it into the Local Computer store.
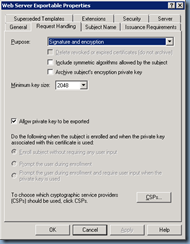
**Note that before you begin, make sure you duplicate the Web Server certificate template and enable the Allow private key to be exported. This duplicated certificate will allow us to install the certificate into the user store and then export it so that we can reimport it into the Local Computer store.
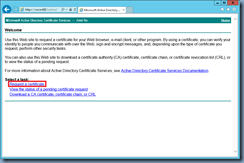
Being by opening a browser and navigate to https://yourInternalCA/certsrv then click on the Request a certificate link:
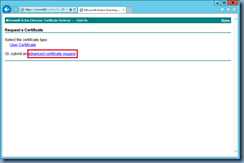
Continue by click on the advanced certificate request link:
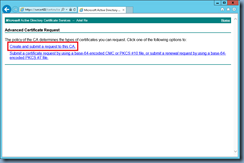
Continue and click on the Create and submit a request to this CA link:
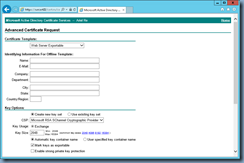
Change the Certificate Template drop down menu to the duplicated Web Server template that allows you to export the certificate. Fill out the fields such as Name, E-Mail, etc as required but make note of the following special fields:
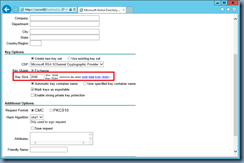
Key Size – Lync Server 2013 requires a minimum of 2048 for key size so if the template defaults to 1024, change it to 2048.
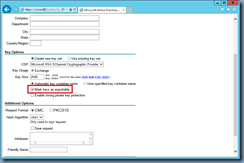
Mark keys as exportable – Ensure that the checkbox for this field is checked.
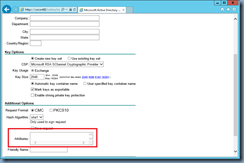
Attributes – This field is optional but I always prefer to use this field to enter SAN names such as the server’s NetBIOS name into the certificate in case someone inadvertently uses the NetBIOS name instead of the FQDN. The format for create an SAN attribute is:
san:dns=dns.name[&dns=dns.name]
So if you’d like to put the NetBIOS name in, you would type in:
san:dns=serverName
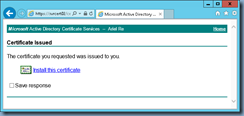
Once the certificate has been issued, proceed with installing the certificate:
Then use the certificates MMC snap-in to export to a file from the user store then reimport into the local computer store.
Create the Office Web Apps Server Farm:
Since Microsoft Lync Server 2013 uses HTTPS for communication to the Office Web Apps Server, we won’t bother configuring HTTP connectivity and so, the cmdlet we’ll be using for the configuration is the following:
New-OfficeWebAppsFarm –InternalUrl “https://serverName.FQDN” -CertificateName “OfficeWebApps Certificate”
“https://serverName.FQDN” – put in the FQDN of your internal Office Web Apps Server and make sure you include the quotes
“OfficeWebApps Certificate” – this is the friendly name of the certificate generated earlier
**Note that the you can also include the -EditingEnabled switch if you have the license to use it with SharePoint 2013. This feature is not used by Lync Server 2013 or Exchange Server 2013.
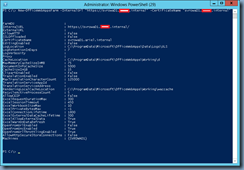
The output of the cmdlet above should look something similar to the following:
**Note that if components of the .NET Framework 3.5 were installed and then removed, you may see “500 Web Service Exceptions” or “500.21 – Internal Server Error” messages when you run the following to fix the errors:
%systemroot%Microsoft.NETFramework64v4.0.30319aspnet_regiis.exe –iru
iisreset /restart /noforce
Verify Office Web Apps Farm:
Verify that the farm has been created by opening up a browser and going to the following URL:
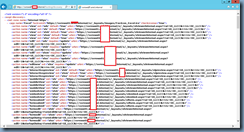
https://yourOfficeWebAppsServerFQDN/hosting/discovery
The follow output should be displayed:
Configure Office Web Apps Server in Lync Server 2013 Topology
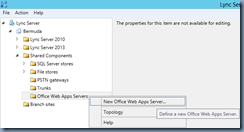
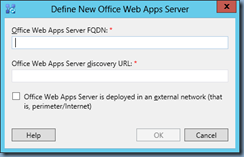
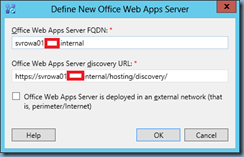
With Office Web Apps Server configured and deployed, proceed with opening up the Lync Server 2013 topology builder and create a new Office Web Apps Server if that hasn’t been done yet.
Once the new Office Web Apps Server has been created, proceed with publishing the topology.
Validating Office Web Apps Server
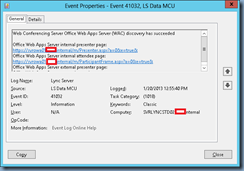
The first item to check once the topology has been published is whether event ID 41032:
Web Conferencing Server Office Web Apps Server (WAC) discovery has succeeded
Office Web Apps Server internal presenter page: https://svr-owa-01.domain.com/m/Presenter.aspx?a=0&e=true&
Office Web Apps Server internal attendee page: https://svr-owa-01.domain.com/m/ParticipantFrame.aspx?a=0&e=true&
Office Web Apps Server external presenter page:
Office Web Apps Server external attendee page:
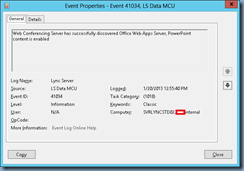
… and 41034 are logged in the Lync Server event logs on the front-end server:
Web Conferencing Server has successfully discovered Office Web Apps Server, PowerPoint content is enabled
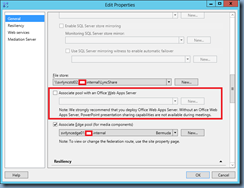
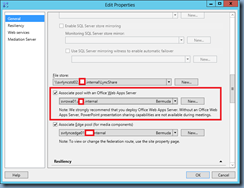
**Note that you won’t see the events 41032 and 41034 logged on your Lync server if you forget to associate the Office Web Apps Server to your front-end server as shown here:
So remember to configure the association if you’re deploying the Office Web Apps Server after you already have the Lync Server 2013 pool up.





6 Responses
Thanks for post your valuable opinion. I think it will be valuable for all kinds of Users.
Please contiune .
Emergency Exchange Support
I can see that its a Emergency support Relevant Blog. But I wil suggested you If you have any problem any kinds of Server Releted. You can Contact with us.
Emergency Exchange Support
Local experts who can visit on-site: Dallas Computer Support, Garland Managed Network Services, Plano Backup and Data Recovery, Richardson IT Consulting,
Addison Cloud Computing, Irving Hosted Email, Dallas Computer Hardware, Managed Network Services Dallas and Garland Hosted Software.
Emergency Exchange Support
Emergency Exchange Remote Support
Web development company Delhi offer PHP web development, PHP application development, iPhone- Android application development services. Hire dedicated web designer from the best web design company India.
b
Interesting post about Server support!
If you are looking for computer network support in Chiswick Compcontrol can provide you with a total service that will save you money. Call 020 3757 6622 today.
This comment has been removed by the author.
you have interesting your post and great work websites design services