Let me first apologize about the delay to everyone who I’ve promised that I’ll write a blog post about setting up coexistence between Microsoft OCS 2007 R2 and Lync Server 2010 as it’s been extremely busy for me in the past few months. So without further ado, let’s dive right into the steps you need to do after deploying Lync into your environment.
Note:
- If you would like to read about the process which I had to go through deploying Lync please see my previous post: https://blog.terenceluk.com/installing-microsoft-lync-server-2010/
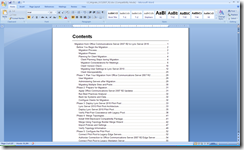
- The following demonstration of the steps for the deployment can also be found in the deployment guide LS_Migrate_OCS2007R2.doc which can be downloaded here: https://www.microsoft.com/downloads/en/details.aspx?FamilyID=cae132e3-84ab-4110-885c-5bab0e64657e
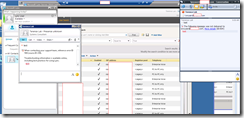
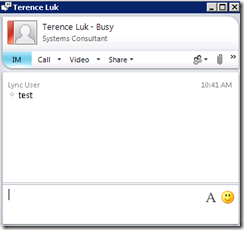
Once you’ve successfully deployed a new Lync Server 2010 pool in the environment, you’ll notice that while you can add legacy users from the legacy OCS 2007 R2 environment, you won’t be able to see their presence information or IM them:
The reason for this is because the next step in the deployment process is to continue with the phases outlined in the deployment guide shown above. This post will start in Phase 4 where we will merge our OCS 2007 R1 or R2 pool with the new topology skipping the steps such as running BPA and running updates so make sure you perform those steps prior to following the process outlined below.
Before we actually merge the topologies, what we need to do is to install the WMI Backward Compatibility Package because Lync Server 2010 stores its configuration information in a Central Management store hosted on a SQL server while Microsoft Office Communications Server 2007 R2 uses the Windows Management Instrumentation (WMI) framework. We will need to install the WMI Backward Compatibility Package because it provides Lync Server 2010 the ability to merge WMI information from Office Communications Server 2007 R2 into the new format in Lync Server 2010.
To install the WMI Backward Compatibility Package, navigate to the setupamd64Setup folder of your Lync Server 2010 installation binaries and execute OCSWMIBC.MSI on your Lync Server 2010’s front-end server:
This MSI file will launch the installer shown in the following screenshot:
Proceed with the installation wizard:
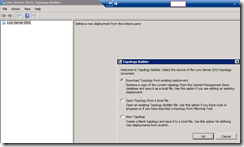
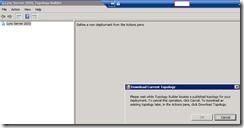
Once completed, launch Lync Server 2010’s Topology Builder and download the topology:
It took me awhile to get used to this but whenever you’re working with your Lync Server 2010 topology, you will need to remember that you’re actually working off of a tbxml file so when you download your topology, the Topology Builder will always ask you to save it:
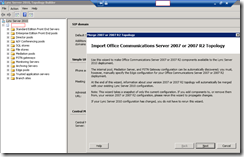
Once you’ve loaded your Lync topology, click on the Actions tab and click on Merge 2007 or 2007 R2 Topology…:
This will launch the following wizard:
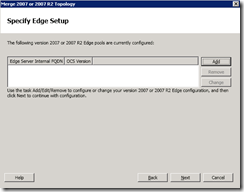
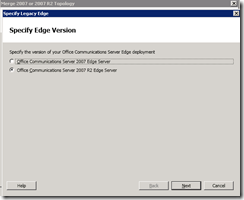
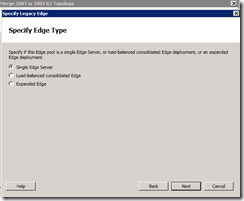
If you have an legacy OCS 2007 R2 edge server deployed, it’s important that you add it while going through the wizard:
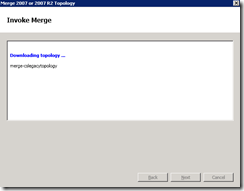
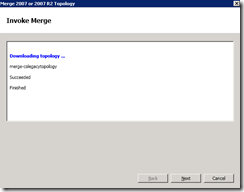
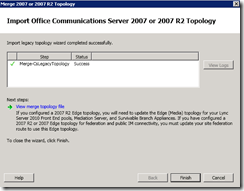
Once you click Next in the screenshot above, the merging of the topology will begin:
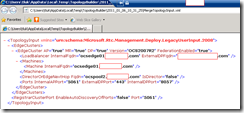
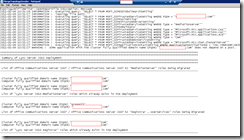
If you’re interested in seeing the logs, you’ll see something like this when you open the xml file:
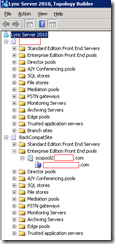
Once you’ve completed the merging of the topologies, you should now see a new node named BackCompatSite in your topology builder:
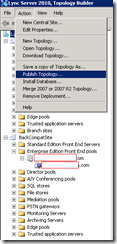
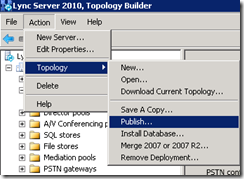
Now that we’ve successfully merged the topologies, we’ll need to finalize the changes by publishing the topology so click on the Action tab and select Publish Topology…:
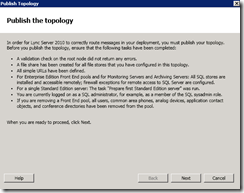
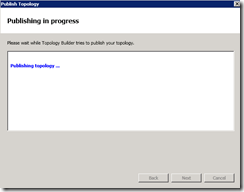
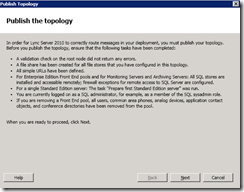
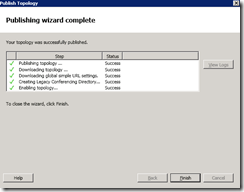
You’ll now see the Publish Topology wizard launch:
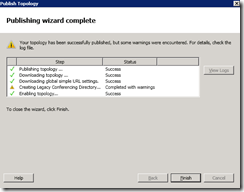
Not everyone is going to see warnings but if there are, have a look at the logs to determine whether it’s worth correcting them:
TopologyXmlFileWriter::OpenReportFile IOException: Message
2011-01-06 10:33:35 INFORMATION : Executing query: “SELECT * FROM MSFT_SIPPoolSetting”
2011-01-06 10:33:35 INFORMATION : Executing query: “SELECT * FROM MSFT_SIPConferencingDirectoryData”
2011-01-06 10:33:35 WARNING : “” is an invalid value for “MSFT_SIPConferencingDirectoryData::PoolDN” “Conferencing Directory” in “Office Communications Server 2007″/”Office Communications Server 2007 R2” deployment.
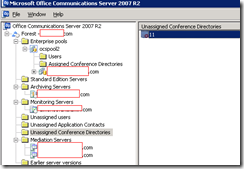
Cannot import Conference Directory with Id:”11″. Please use the Office Communications Server 2007 R2 MMC snapin to find this under the Unassigned Conference Directories node and remove it.
2011-01-06 10:33:35 INFORMATION : Executing query: “SELECT * FROM MSFT_SIPPoolSetting WHERE PoolDN = “CN=LC Services,CN=Microsoft,CN=ocspool2,CN=Pools,CN=RTC Service,CN=Services,CN=Configuration,DC=domain,DC=com””
2011-01-06 10:33:35 INFORMATION : Executing query: “SELECT * FROM MSFT_SIPPoolSetting WHERE PoolDN = “CN=Lc Services,CN=Microsoft,CN=1:1,CN=Pools,CN=RTC Service,CN=Services,CN=Configuration,DC=domain,DC=com””
2011-01-06 10:33:36 WARNING : Total number of warnings is 1
In my case, it’s just an orphaned conference directory that needed to be removed from our legacy OCS 2007 R2 environment:
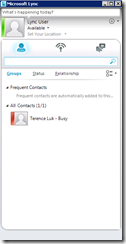
Once you’ve successfully merged and published the topology, you should now be able to see presence information and also be able to IM users on your legacy OCS 2007 R2 pool:
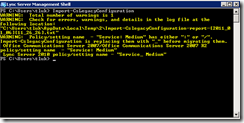
Continuing with the deployment guide, the next step is to import the policies and settings from your OCS 2007 R2 legacy environment to your Lync Server 2010 pool with the Import-CsLegacyConfiguration cmdlet. Once you’ve executed this cmdlet, your new Lync pool will have the policies, voice routes, dial plans, Communicator Web Access URLs, and dial-in access confirmed in your OCS 2007 R2 pool.
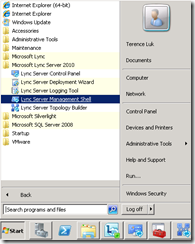
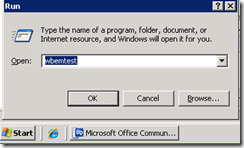
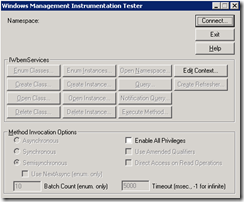
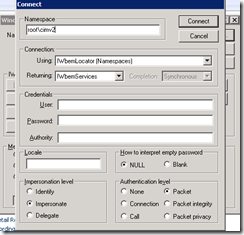
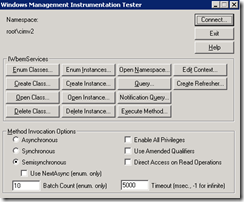
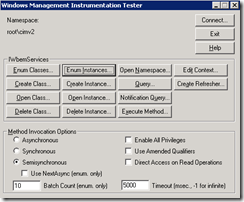
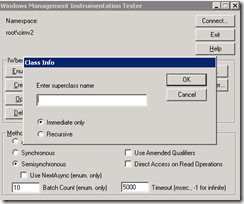
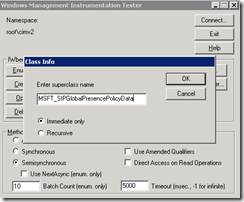
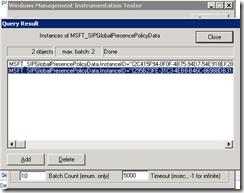
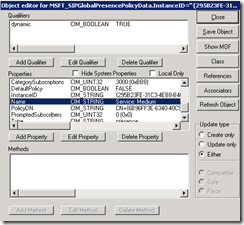
Make a note of any errors or warnings that you see on the output and determine whether it’s important to look into it. In the case of the warning above, I went ahead to look at the logs to determine which policy threw the warning and then cleaned it out with wbemtest:
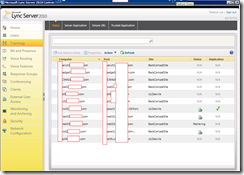
Sorry about the short detour but once you’ve importing the configuration of your OCS 2007 R2 pool, it’s important that you do a sanity check by reviewing the topology information. You can verify that your legacy OCS 2007 R2 topology was imported properly by launching the Lync Server 2010 Control Panel, navigate to Topology then the Status tab:
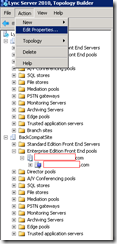
Now that you’ve completed reviewing your legacy topology information, the next step is to associate the legacy Edge server or pool with your Lync topology and the first step for this process is to configure your federation route assuming you have this configured for your legacy OCS 2007 R2 pool. From the Topology Builder, click on the Action tab and select Edit Properties:
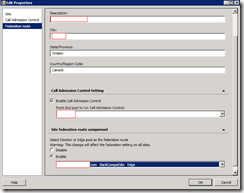
Select Federation Route in the window, click on the Enable radio button and select your Edge or Director server:
Note: if the option above is grayed out, see this post: https://blog.terenceluk.com/microsoft-lync-server-2010s-federation/
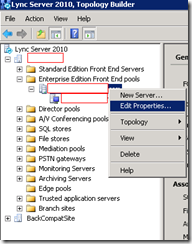
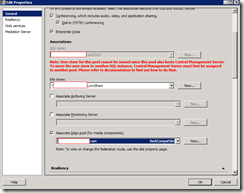
The next step is to associate your edge for the media components and to do this, right-click on your new Lync Server 2010 pool in Topology Builder and select Edit Properties…:
Under the General options, scroll down on the right hand pane, check off the Associate Edge pool (for media components checkbox and select your Edge server or pool:
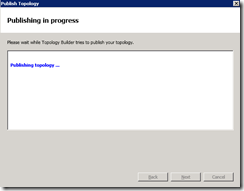
As you’re probably used to by now, we’ll now need to publish the topology:
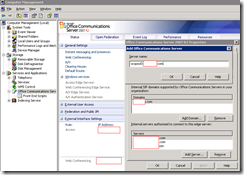
Now that we have our Lync Server 2010 topology configured with our legacy edge server information, we will need to configure our legacy edge server to authorize our new Lync Server 2010 pool to connect to it so log onto your OCS 2007 R2 edge server, open the properties and navigate to the Internal servers authorized to connect to this edge server and add the FQDN of:
- Each Lync Server 2010 Front End Server or Standard Edition server.
- The Lync Server 2010 Director if you configured a static route on the pool that specifies the next hop computer by its FQDN.
Now that we have the edge configuration completed, the next step is to connect our Lync Server 2010 pool to our legacy OCS 2007 R2 mediation server and there are 2 ways to do this:
- Use the GUI
- Use the cmdlet
Which way you choose to perform the steps is up to you but both allows you to configure a voice route that sends calls originating from your Lync Server 2010 pool out to the OCS 2007 R2 mediation server and thus not having to configure a connection from your Lync Server 2010’s mediation server to a gateway.
Using the GUI
As per the deployment guide on page 60:
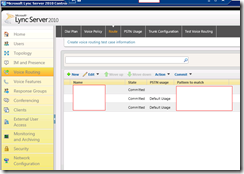
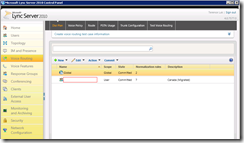
Open up the Microsoft Lync Server 2010 Control Panel and navigate to the Voice Routing section then click on the Route tab:
Note: If you see routes in this window, they’re most likely routes that were imported from your legacy environment.
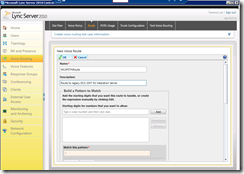
Clicking on the New button will open the New Voice Route window:
Fill in the information for the following fields:
Name: enter a descriptive name of the voice route (i.e. W13PSTNRoute).
Description: enter a short description of the voice route.
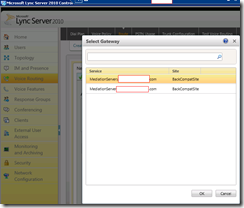
Skip all remaining sections until you reach Associated gateways, click Add and select the mediation server or gateway as it pertains to your legacy environment (we use a direct SIP trunk to a Cisco Call Manager):
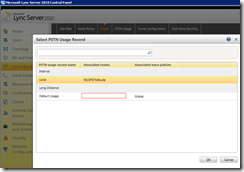
Navigate to the Associated PSTN Usages, click Select, then select the PSTN Usage you would like to use (i.e Local) and click OK:
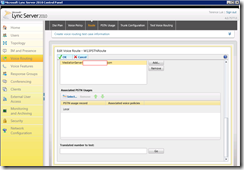
Continue by clicking OK again to close the window:
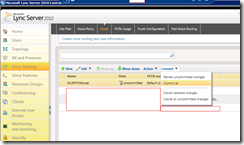
Move the route to the top of the list and commit the changes:
Using the Management Shell
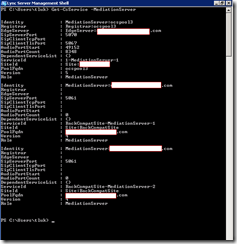
I actually preferred to use the management shell instead for this step as it allows me to do everything in one shot. Before you can execute the command to create the route, you will need to obtain the information for your mediation server first with the command:
Get-CsService –MediationServer
Note the mediation servers listed. We had 2 but the one I wanted to use was the first one:
Once you have the information, execute the command:
New-CsVoiceRoute -Name W13PSTNRoute -NumberPattern “.*” -PstnUsages Local -PstnGatewayList @{Add=”MediationServer:medsvr01.contoso.net “}
Note: You can find detailed information about this in the deployment guide on page 61.
Once that command executes, you use the following command to move the route to the top of the list:
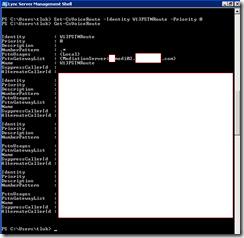
Set-CsVoiceRoute -Identity W13PSTNRoute -Priority 0
After executing these cmdlets, use the Get-CsVoiceRoute cmdlet to confirm the new route created:
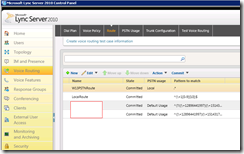
Reviewing the W13PSTNRoute in the control panel should show the route created looking exactly like the example showing how to do this in the GUI:
Once you’ve completed the step above, you will now need to decide whether you want to create new normalization rules in your Lync Server 2010’s default global dial plan or reuse dial plans you’ve imported from your legacy environment.
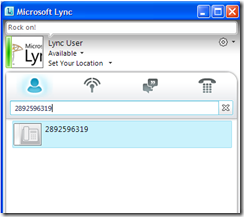
In the case where you have your Lync Server 2010’s enterprise voice users enabled with all the default settings, you’ll notice that you won’t have any normalization rules and therefore if you try to make a call out to: 2892596319, you’ll see that the number does not get normalize and will fail:
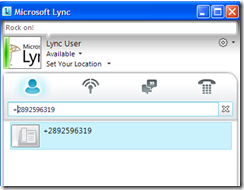
To do a quick test without having to put in normalization rules, you can simply add a + in front of the number to dial so that Lync Server 2010 will send it out to your gateway:
The last step I’m going to include which isn’t apart of the migration guide is to setup an additional UM IP Gateway within Exchange 2007 or 2010 Unified Messaging so that the Call Voice Mail and Change Greetings features available through your Lync client work:
When you use either of the two features shown in the above screenshot, you actually initiate a connection between the pool you reside on and the Exchange UM server host your dial plan. Everything that we’ve done so far allows us to send calls and IM traffic through our old legacy environment but since our the features provided by our Lync client actually gets the new Lync Server 2010 front-end pool to initiate a connection to the UM server, we will need to set up a new UM IP Gateway on the Exchange 2007 or 2010 Unified Messaging server so that it will accept direct Lync pool connections to it. To do this, log into anyone of your Exchange servers and open the Exchange Management Console, navigate to Microsoft Exchange –> Organization Configuration –> Unified Messaging and click on the UM IP Gateway tab:
As shown in the screenshot above, we only have ocspool2 (OCS 2007 R2) as a UM IP Gateway so what we need to do is to allow our Lync Server 2010 pool to connect to Exchange UM is to configure an additional UM IP Gateway as such:
With the additional ocspool3 gateway configured, you should now be able to use the voicemail features provided by your Lync client.
——————————————————————————————————————————————————————-
The following list summarizes what features are available from the configuration we’ve performed:
- You should be able to log into a Lync Server 2010 account via Edge.
- You should be able to log into a Lync Server 2010 account via internally (no need to change your SRV records because authentication for a Lync user going to your OCS 2007 R2 pool will get passed to your Lync pool).
- Make the same calls you would normally be able to do if you were an OCS 2007 R2 user (only catch is the normalization rules as mentioned above).
- Instant Message, desktop share, and presence should work between Lync to Lync, OCS 2007 R2 to Lync.
- Voicemail mailbox and features access should work from your Lync client.
What won’t work:
Many features such as the new mediation server features of Lync and address book download for external users won’t work because we haven’t completed the configuration. This is the part 1 of the series that I will write about so stay tuned for all the other tasks you’ll need to do.












5 Responses
Hi Terence,
I got a doubt in this co-existence setup. Were you able to login to both Lync client and MOC using the legacy users without any 301 Redirect issue ? I am getting this error while login through Lync Client.
This comment has been removed by the author.
What a great article. Microsoft should hire you to interpret all of their deployment guides. Nice work and thank you.
John
Thanks Terence for a good article.
My Lync pilot was able to connect back to the legacy, but when I added a new pool it was not able to see them. Do I need to merge the topology each time I add a new pool on Lync?
Can I install edge pool into new lync 2013 organization? or I have to wait to migrate from OCS to new lync 2013 organization before to create a new edgpool?? I would like to install the new edge pool to configure webconfernce and AV settings. Regards.