As a continuation of the AD FS deployment from two of my previous posts:
Deploying a redundant Active Directory Federation Services (ADFS) Web Application Proxy servers on Windows Server 2019
https://blog.terenceluk.com/deploying-redundant-active-directory-21/
Deploying a redundant Active Directory Federation Services (ADFS) farm on Windows Server 2019
https://blog.terenceluk.com/deploying-redundant-active-directory/
This post serves to demonstrate the configuration of Citrix ADC (formerly known as Citrix NetScalers) to load balance the ADFS farm as well as the ADFS Web Application Proxy (WAP) servers.
Design Considerations
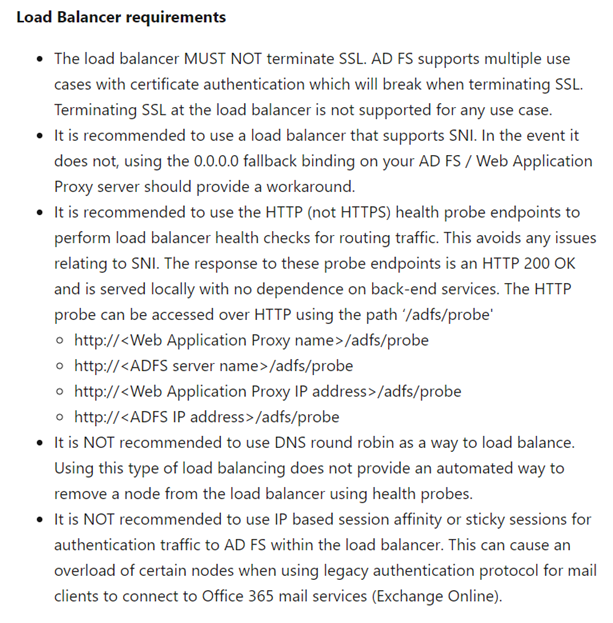
As outlined in the Load Balancer requirements section in the following Microsoft documentation:
AD FS Requirements
https://docs.microsoft.com/en-us/windows-server/identity/ad-fs/overview/ad-fs-requirements
- The load balancer MUST NOT terminate SSL. AD FS supports multiple use cases with certificate authentication which will break when terminating SSL. Terminating SSL at the load balancer is not supported for any use case, which means the Protocol you will use for your Load Balancing Service Group and Virtual Server will be SSL_BRIDGE and not SSL as the latter terminates the SSL connection and re-establishes the connection.
- SNI support is recommended and any Citrix ADC / NetScaler above version 11.1 supports it
- The health probe that the Citrix ADC should use to monitor the health of the ADFS servers should be HTTP and not HTTPS.
- ADFS also does not support HEAD requests (https://docs.microsoft.com/en-us/windows-server/identity/ad-fs/overview/ad-fs-faq#does-ad-fs-support-head-requests) so the Citrix ADC should use a GET request to probe the health of the server.
- DNS round robin is not recommended but this won’t be an issue as we’ll be using a Citrix ADC to provide load balancing.
- It is NOT recommended to use IP based session affinity or sticky sessions for authentication traffic to AD FS within the load balancer. This can cause an overload of certain nodes when using legacy authentication protocol for mail clients to connect to Office 365 mail services (Exchange Online).
IP Requirements
- 1 x IP address will be required for the VIP of the load balancing virtual server on the Citrix ADC that represents the internal ADFS farm
- 1 x IP address will be required for the VIP of the load balancing virtual server on the Citrix ADC that represents the internal ADFS WAP servers
- 1 x public IP address will be required to NAT traffic from the internet to the WAP VIP
We’ll be using a Citrix ADC VPX 200 Standard license with the build NS13.0 52.24.nc for this demonstration.
Firewall Rules
- Other than port 443 traffic between the Citrix ADC / NetScaler, you will also need to allow port 80 in order to monitor the health of the ADFS server (both internal farm and Web Access Proxy)
- ICMP is optional and is convenient for troubleshooting at times but it is not necessary
Internal ADFS farm and WAP Servers
- The Load Balancing virtual server for the internal ADFS farm servers and the WAP servers will have the same configuration all of the components:
- Monitor
- Service Group
- Virtual Server
This essentially means that you can confirm the load balancing virtual server for the internal ADFS farm servers then repeat the same for the WAP servers.
Creating a Service Monitor
One of the most common question I am asked the most is how to properly create a service monitor for the ADFS servers as Microsoft recommends against monitoring the service via HTTPS and to use HTTP as described in the following documentation under the Load Balancer requirements:
AD FS Requirements
https://docs.microsoft.com/en-us/windows-server/identity/ad-fs/overview/ad-fs-requirements#BKMK_7
- It is recommended to use the HTTP (not HTTPS) health probe endpoints to perform load balancer health checks for routing traffic. This avoids any issues relating to SNI. The response to these probe endpoints is an HTTP 200 OK and is served locally with no dependence on back-end services. The HTTP probe can be accessed over HTTP using the path ‘/adfs/probe’
- https://<Web Application Proxy name>/adfs/probe
- https://<ADFS server name>/adfs/probe
- https://<Web Application Proxy IP address>/adfs/probe
- https://<ADFS IP address>/adfs/probe
Another common blog post I am sent for review is the following:
Load balancing ADFS and ADFS Proxy using Citrix ADC
https://www.vcloudnine.de/load-balancing-adfs-and-adfs-proxy-using-citrix-adc/
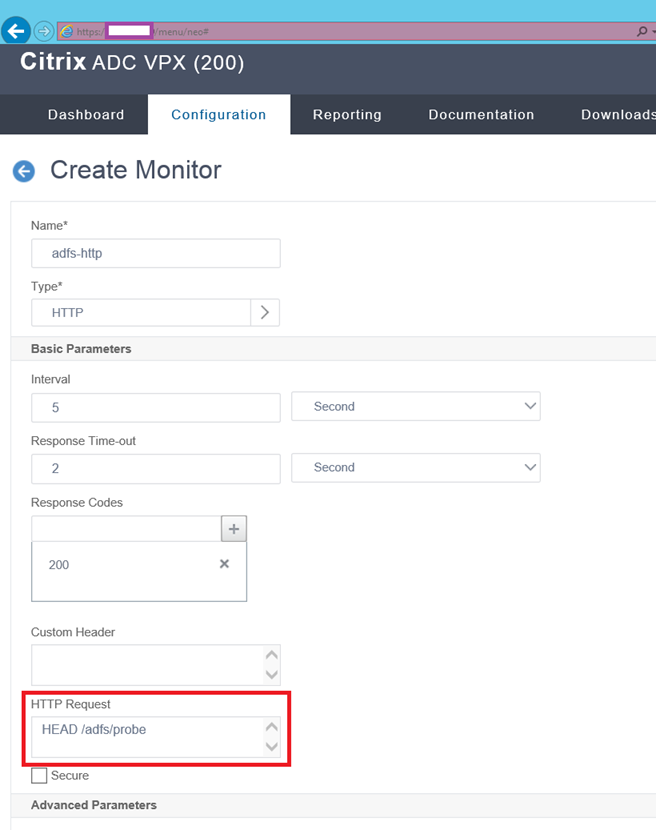
While the write up is excellent with describing the behavior and monitoring process of the service, the following use of the HEAD request for the monitor would not work:
add lb monitor mon_adfs_http HTTP -respCode 200 -httpRequest “HEAD /adfs/probe” -LRTM ENABLED -destPort 80
Attempting to configure such a monitor with the HTTP Request configured as HEAD /adfs/probe as shown in the following screenshot will cause the probe to fail.
It does not come to a surprise that this is a common mistake as the HEAD request is the default when a HTTP monitor is created and the Microsoft documentation explicitly states ADFS also does not support HEAD requests (https://docs.microsoft.com/en-us/windows-server/identity/ad-fs/overview/ad-fs-faq#does-ad-fs-support-head-requests) so the monitor would display the following probe error:
Failure – HTTP response code 405 received.
This can also be tested directly from the Citrix ADC / NetScaler by getting into the Linux shell and executing:
HEAD <IP Address>/adfs/probe
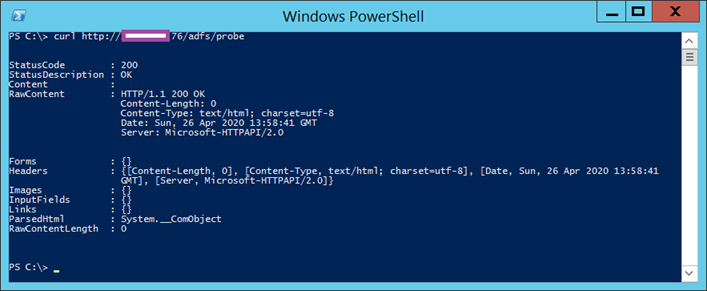
The correct method of retrieving the health of the ADFS server is through the GET method, which would return a 200 OK response:
GET -s <IP Address>/adfs/probe
***Note that you need to include the -s as that switch displays the status code but it is not needed when configuring the monitor.
If you omit the -s then no output would be displayed:
—————————————————————————————————————————-
Extra Commands to Test
Another command that can be executed within the Linux shell of the Citrix ADC / NetScaler to test the health of the ADFS is:
curl -i https://<IP Address>/adfs/probe
You can also use the same curl command within a PowerShell console to probe the health ADFS server:
curl https://<IP Address>/adfs/probe
—————————————————————————————————————————-
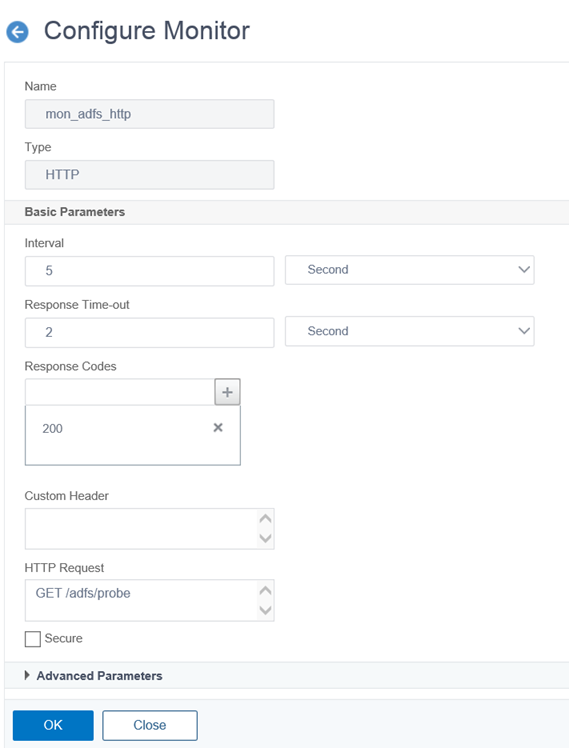
With the above outlined, create a HTTP type monitor as shown in the following screenshots:
Name: A preferred monitor name (e.g. mon_adfs_http)
Type: HTTP
Interval: 5 seconds
Response Time-out: 2 seconds
Response Codes: 200
Custom Header: <leave blank>
HTTP Request: GET /adfs/probe
Secure: <unchecked>
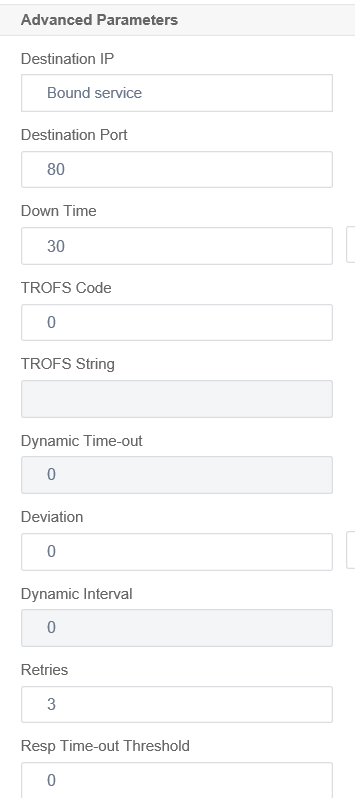
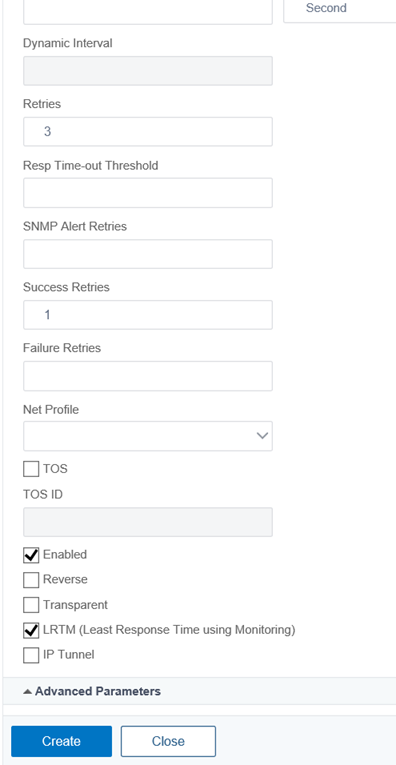
Advanced Parameters
Leave all settings as default and configure the following:
Destination Port: 80
Enable LRTM (Lease Response Time using Monitoring):
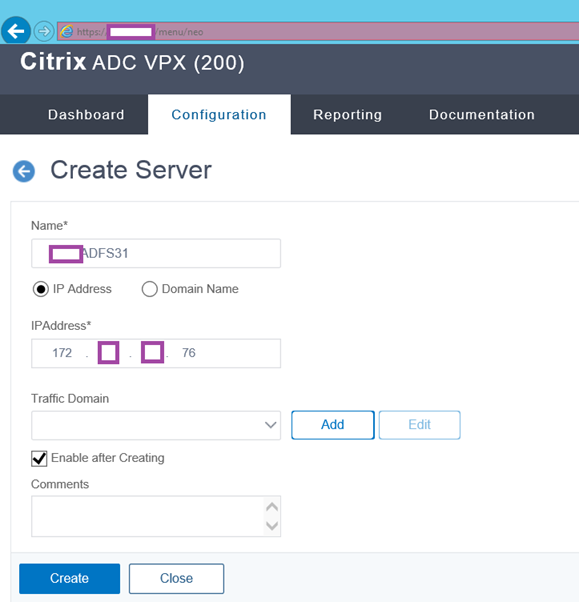
Create Server Objects
Create the server objects on the Citrix ADC that represents ADFS servers. This demonstration will use the internal server farm servers as an example but the steps are the same for the Web Application Proxy (WAP) servers that provide external ADFS connectivity.
Repeat the same procedure for all of the servers in the farm.
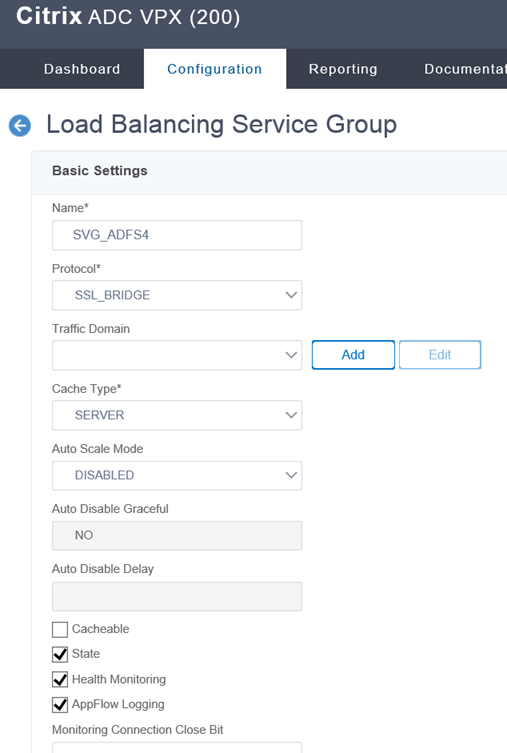
Create Service Group
It is possible to use either Services of Service Groups to represented the ADFS service that will be offered but Service Groups provide an simpler method of adding more than one server for the service so this example will employ this approach.
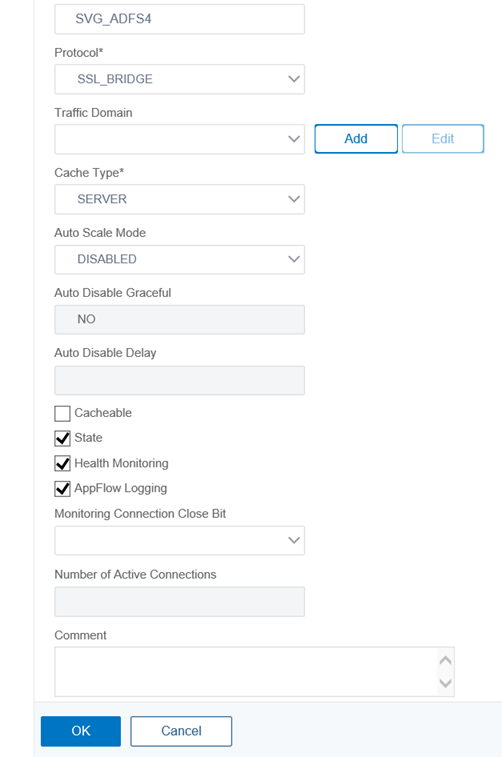
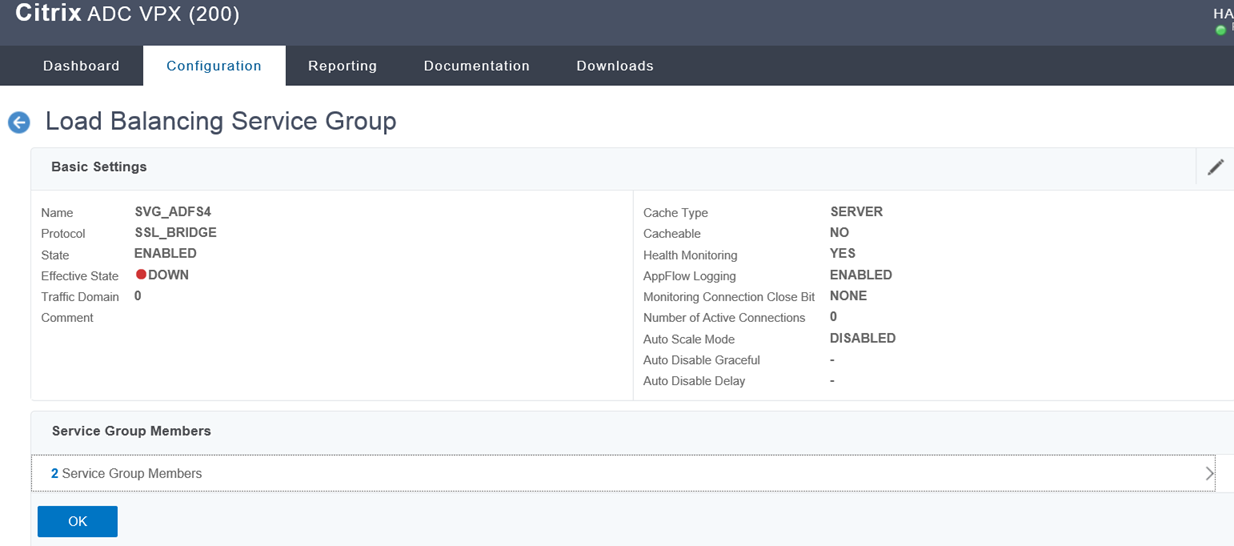
Provide a name for the Load Balancing Service Group, configure the protocol as SSL_BRIDGE and leave the rest of the parameters as the default.
***Note that as mentioned above (and repasted below), we cannot terminate the SSL connection on the load balancer as this is not supported.
The load balancer MUST NOT terminate SSL. AD FS supports multiple use cases with certificate authentication which will break when terminating SSL. Terminating SSL at the load balancer is not supported for any use case.
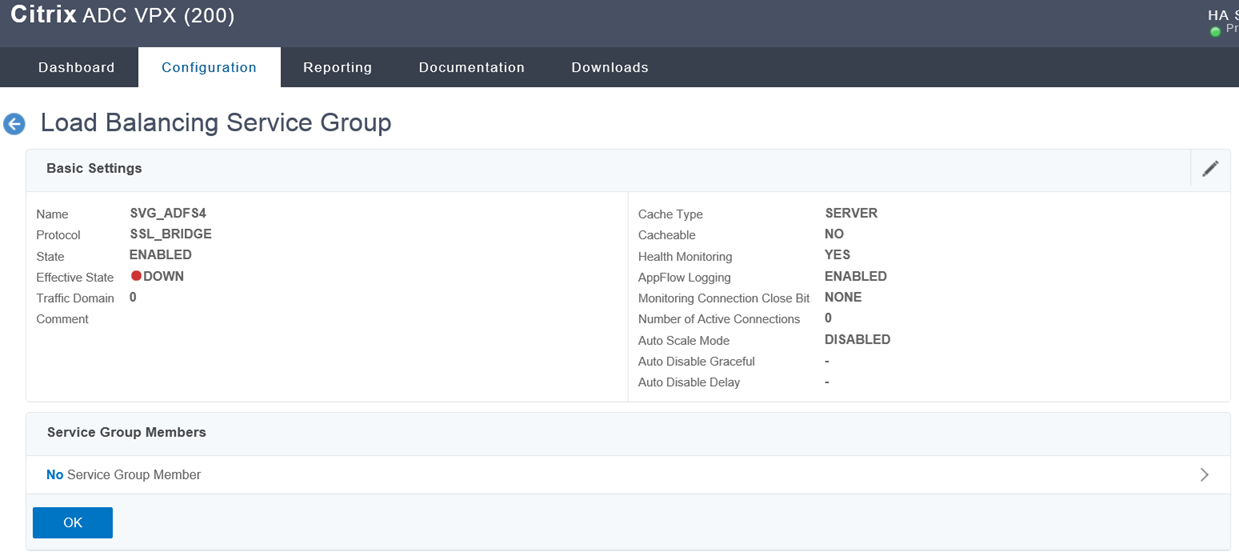
With the empty service group will be created, click on No Service Group Member to add the previously created server objects that were created:
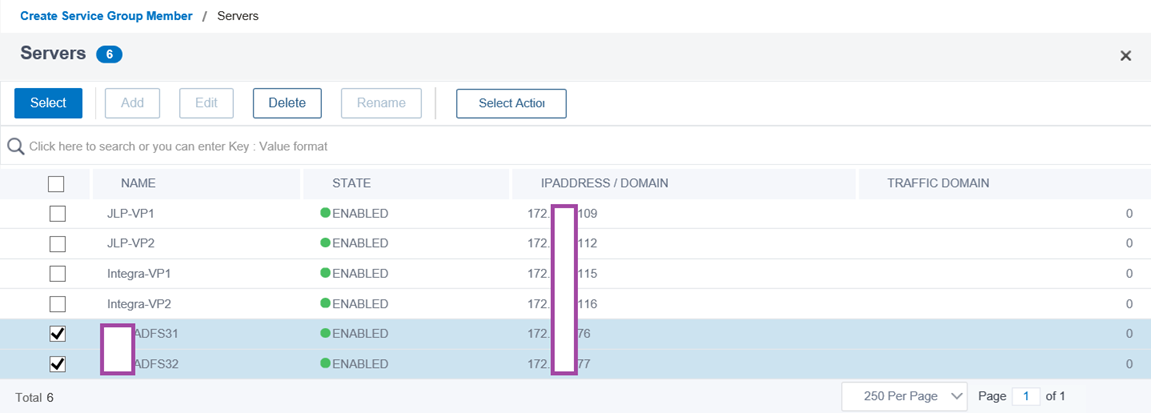
Proceed to select the servers for the ADFS farm:
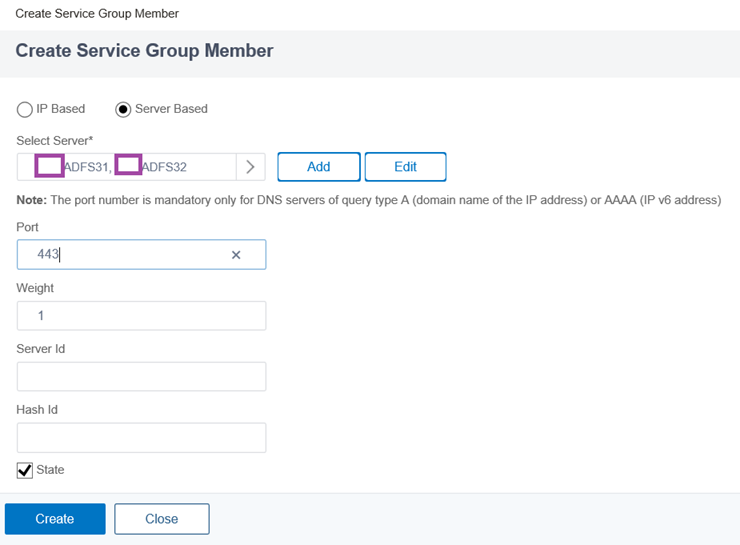
Configure the Port for the two servers to be 443 and leave the rest as defaults:
The selected servers will now be in the service group:
Proceed to click on the Monitors option on the right side of the load balancing service group:
Click on the No Service Group to Monitor Binding to add the previously created monitor for the ADFS servers:
Click on the Add button to display the available monitors:
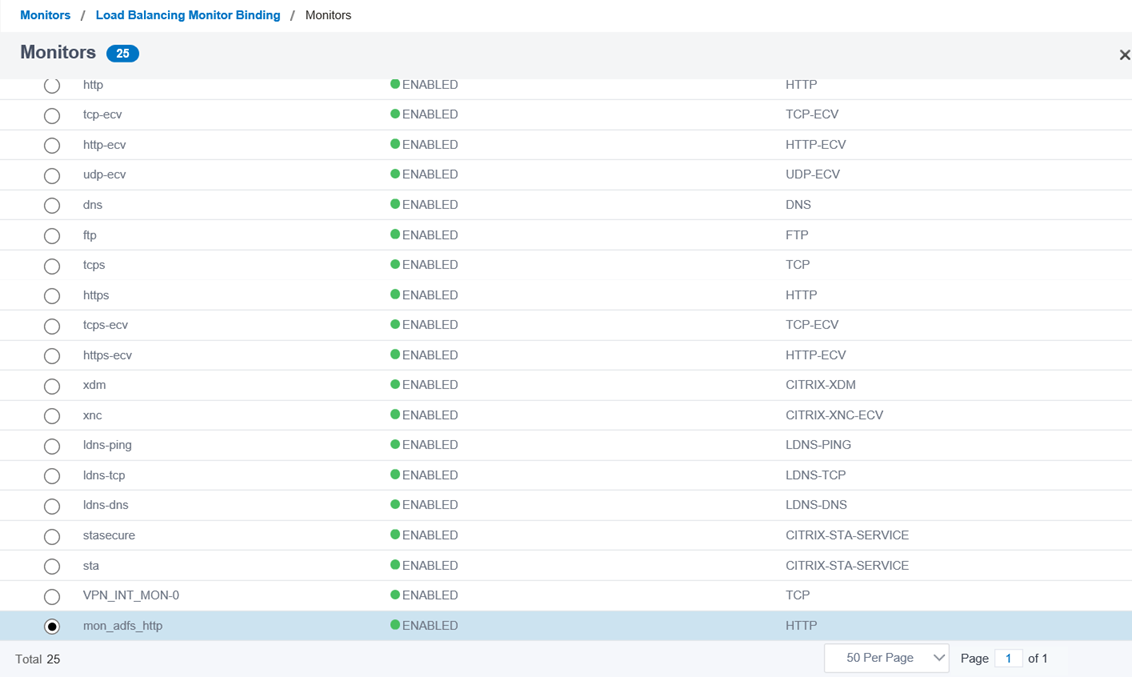
Select the previously created monitor from the bottom of the list (new monitors are placed at the bottom):
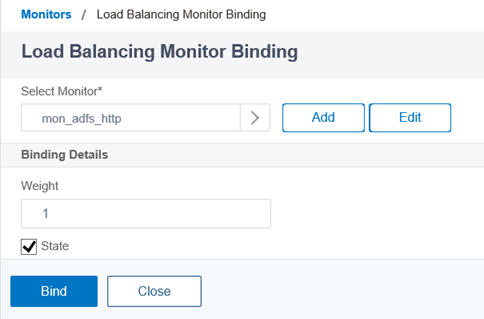
Click on the Bind button to bind the monitor to the service group:
The Monitors section should now display 1 Service Group to Monitor Binding:
Click Done to complete the configuration for the service group:
Create Virtual Server
Proceed to create a new virtual server:
Provide a name for the Virtual Server, configure the protocol as SSL_BRIDGE, enter the pre-allocated VIP as the IP Address, specify the port as 443, and leave the rest of the parameters as the default.
With the newly created Load Balancing Virtual Server created, click on No Load Balancing Virtual Server ServiceGroup Binding to add the previously created Service Group:
Click on the Add button:
Select the Service Group created earlier:
Click on the Bind button to complete the configuration:
Complete the creation of the virtual server by clicking on Done:
Confirm that the virtual server’s State and Effective State is in an UP state, then repeat the same procedure for the Web Application Proxy (WAP) servers.








3 Responses
Hello, is it possible to see originating source IP in the ADFS logs with this method?
Any answer to arma's question? I'd like to know this as well.
Hello, apologies for the late reply but there isn't an easy way to do so because we are using SSL_Bridge which means we cannot insert an IP into the packets being delivered to the ADFS server. The only way I can think of is using DSR but I usually do not recommend that because a requirement would be that your NetScaler resides on the same subnet as the ADFS server.