As noted in one of my previous posts:
Configuring a custom shell launcher with VMware Horizon View Client on a Dell Wyse 7020 Windows 10 IoT device
https://blog.terenceluk.com/configuring-custom-shell-launcher-with/
I was recently involved with building a base image for a Dell Wyse 7020 Windows 10 IoT device that was non-domain joined and used a customized VMware Horizon View shell without access to the desktop for users to log into their virtual desktops. The build is not quite complete in the way I want it to be due to the time constraint I had to work with but the steps outlined in this blog post should provide a good set of steps as a start.
Base Operating System Image
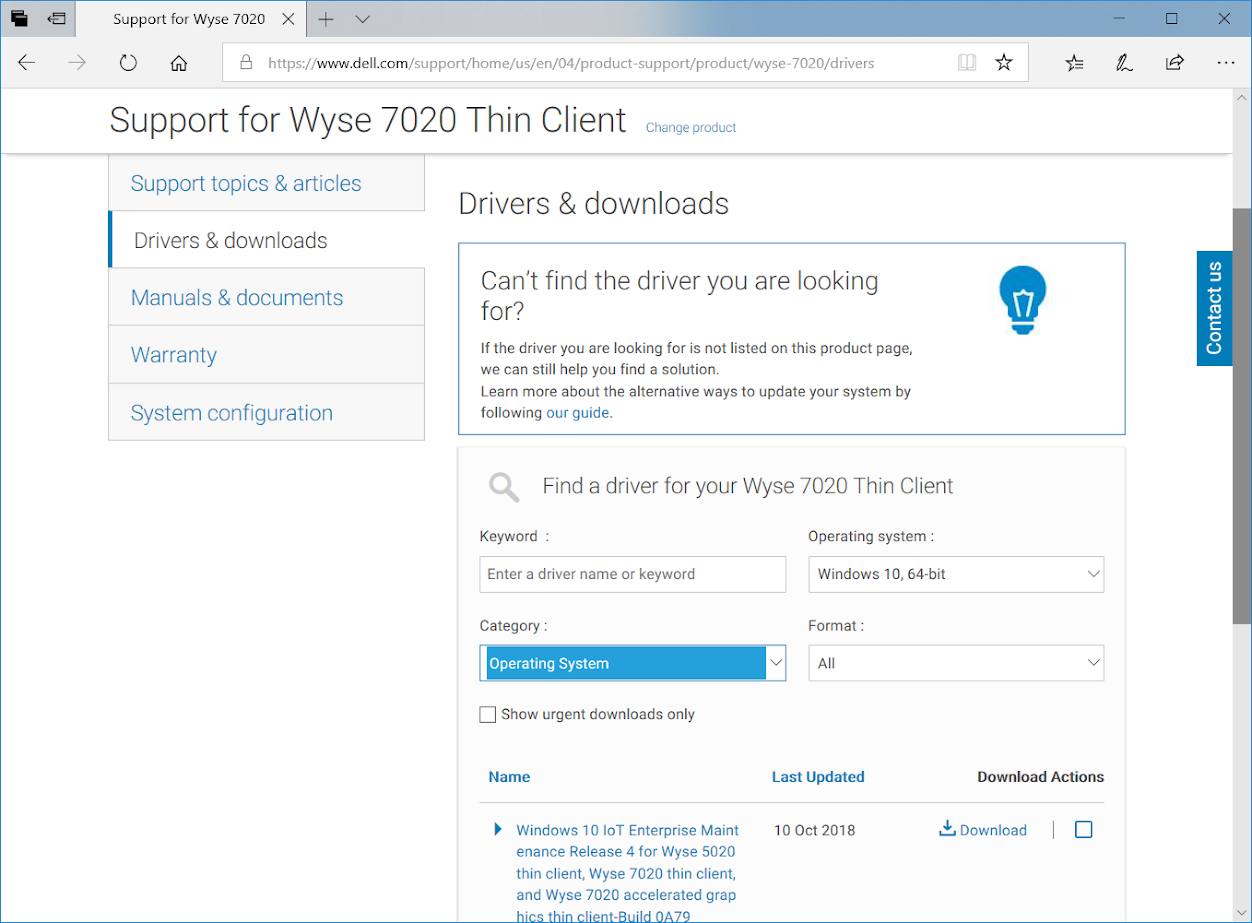
Windows 10 IoT Maintenance Release
Download the latest Dell provided Windows 10 IoT Enterprise Maintenance Release at the following URL:
https://www.dell.com/support/home/us/en/04/product-support/product/wyse-7020/drivers
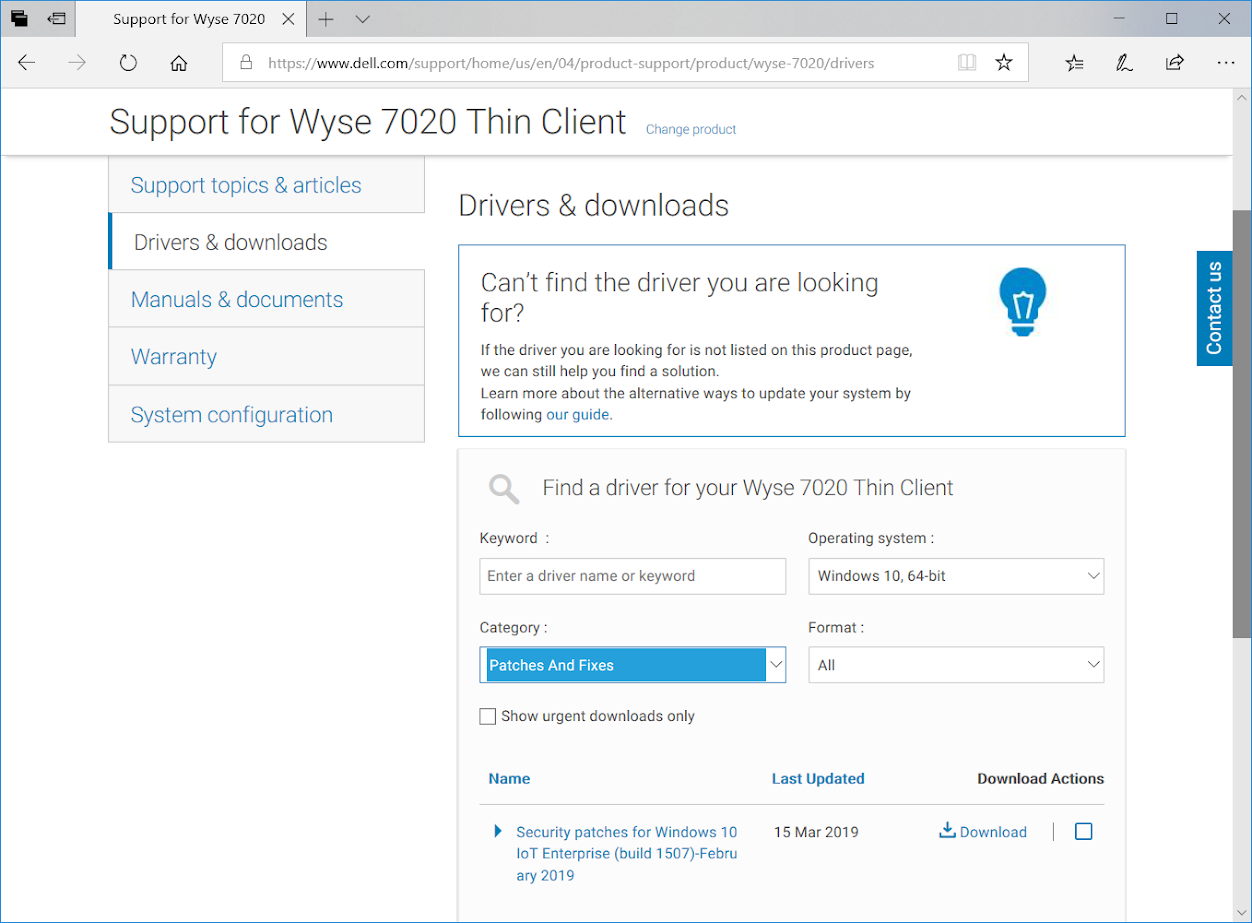
Security Patches
Download and install the latest security patches from the following URL:
https://www.dell.com/support/home/us/en/04/product-support/product/wyse-7020/drivers
Base Applications
Remove Unused Applications
TightVNC
Remove the pre-installed TightVNC with the following commands:
cd
“C:Program FilesTightVNCtvnserver.exe” -remove
rmdir “C:ProgramDataMicrosoftWindowsStart MenuProgramsTightVNC” /s /q
rmdir “C:Program FilesTightVNC” /s /q
Ericom Connect Client
Remove the pre-installed Ericom Connect Client software with the following command:
wmic product where name=”Ericom Connect Client” call uninstall
Ericom PowerTerm InterConnect for Thin Clients
Remove the pre-installed Ericom PowerTerm InterConnect for Thin Clients
software with the following command:
wmic product where name=”Ericom PowerTerm InterConnect for Thin Clients” call uninstall
Lync VDI Plugin
VMware Horizon View now utilizes a gen 2 Skype for Business Server integration that is built directly into the Horizon View Client so there is no need to have the Lync VDI plug-in installed onto the thin client. Remove the plug-in by creating the follow XML file:
<Configuration Product=”Lyncvdi”>
<Display Level=”none” CompletionNotice=”no” SuppressModal=”yes” AcceptEula=”yes” />
<Setting Id=”SETUP_REBOOT” Value=”Never” />
</Configuration>
Then executing this command:
“C:Program FilesCommon Filesmicrosoft sharedOFFICE15Office Setup ControllerSetup.exe” /UNINSTALL Lyncvdi /config D:TMRUK-7020UninstallLync.xml
Then executing this command:
“C:Program FilesCommon Filesmicrosoft sharedOFFICE15Office Setup ControllerSetup.exe” /UNINSTALL Lyncvdi /config D:TMRUK-7020UninstallLync.xml
Operating System Customizations
Remove Unused
Enabled Firewall
Enable the Windows firewall on the Windows 10 IoT operating system.
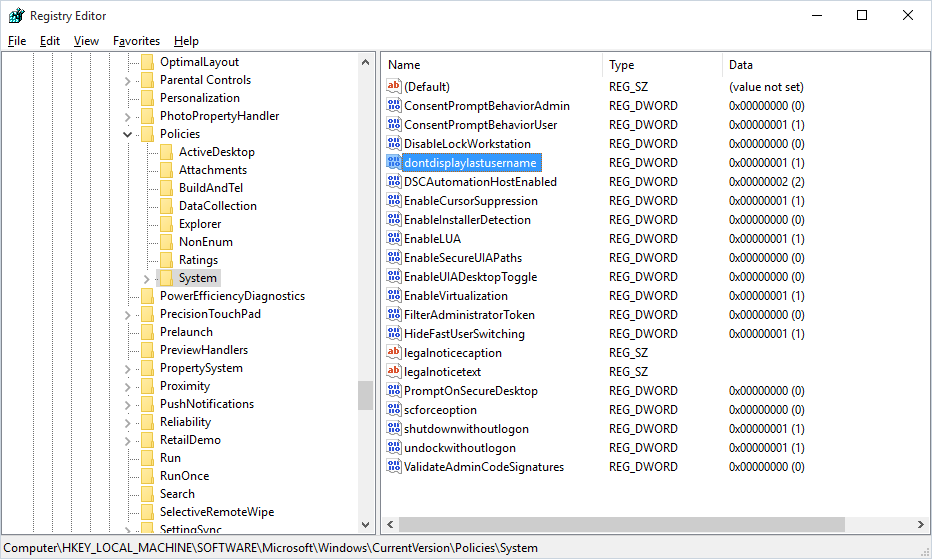
Disable Display Last User Name
Disable remember credentials for Windows which would also cause the Horizon View client to not remember the previous login via the registry key:
Windows Registry Editor Version 5.00
[HKEY_LOCAL_MACHINESOFTWAREMicrosoftWindowsCurrentVersionPoliciesSystem]
“dontdisplaylastusername”=dword:00000001
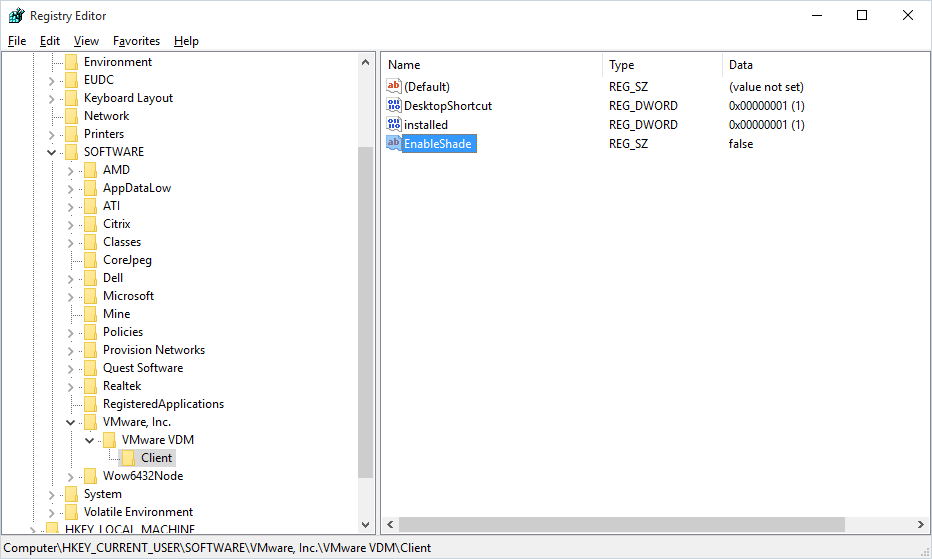
Disable VMware Horizon View Client Shade
Disable the shade of the VMware Horizon View client via the registry key for the User account:
Windows Registry Editor Version 5.00
[HKEY_CURRENT_USERSOFTWAREVMware, Inc.VMware VDMClient]
“EnableShade”=”false”
**Note that this is added to the local user account’s HKCU. The HKCM configuration never worked during my testing.
Force Num Lock On
Create the following registry key file (.reg) and import the configuration to force Num Lock on for all profiles.
Windows Registry Editor Version 5.00
[HKEY_USERS.DEFAULTControl PanelKeyboard]
“InitialKeyboardIndicators”=”2”
“KeyboardDelay”=”1”
“KeyboardSpeed”=”31”
Configure Power Plan
The preparation of the image for capture does not retain the Power Plan settings but it is still good to configure it in case future versions of the script does.
Set Power Plan to High Performance
Execute the following command to configure the power plan as High performance:
powercfg -setactive 8c5e7fda-e8bf-4a96-9a85-a6e23a8c635c
Turn off Display
Execute the following command to configure the high performance power plan to turn off the display after 15 minutes:
powercfg -x -monitor-timeout-ac 15
Computer Sleep Mode
Execute the following command to configure the high performance power plan to never put the computer to sleep:
powercfg -x -standby-timeout-ac 0
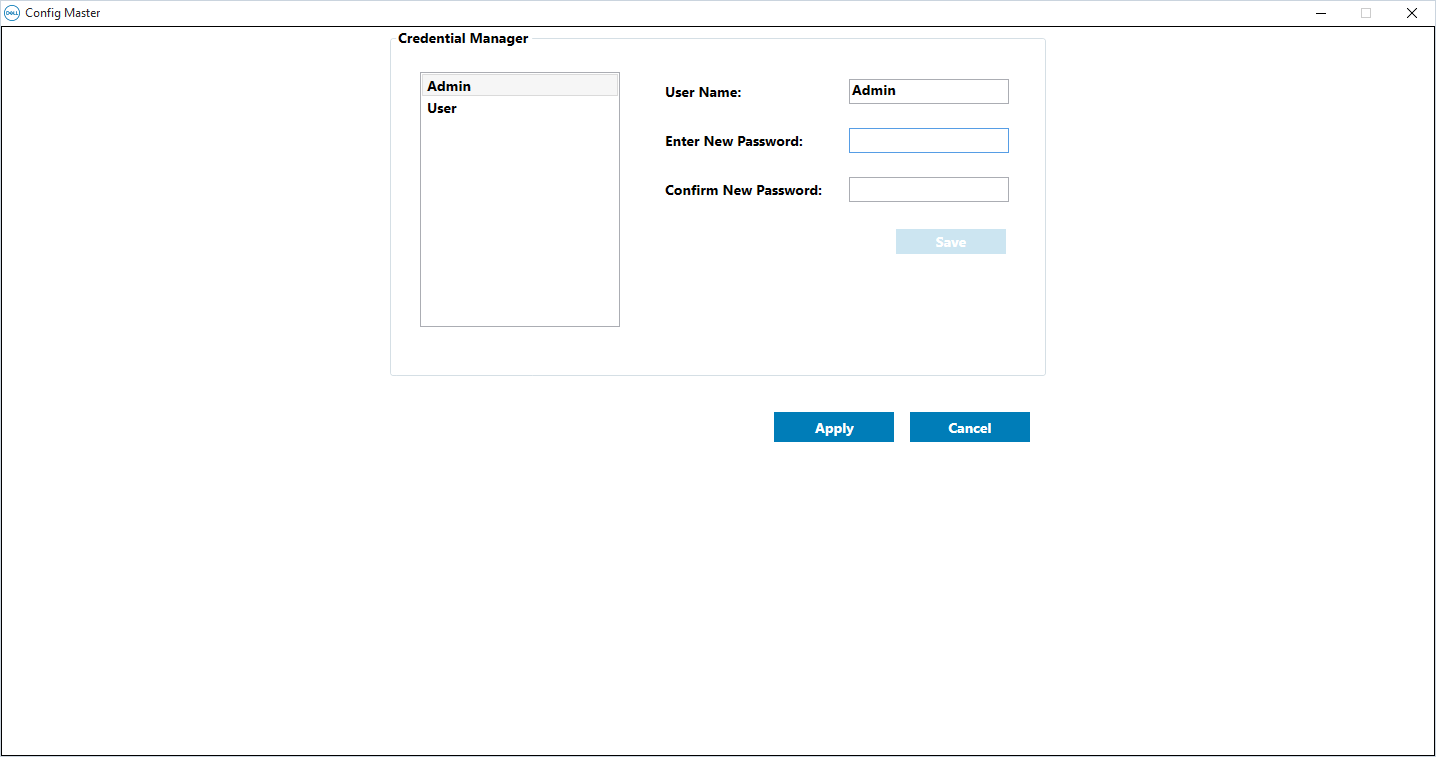
Change Admin and User account credentials
Change the default DellCCCvdi credentials for both the Admin and User account.
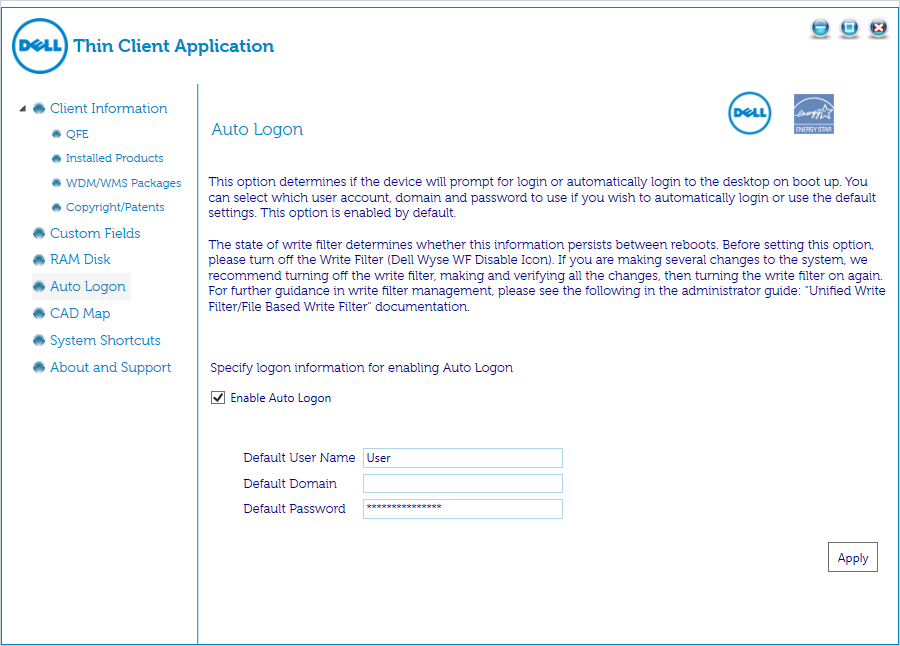
Update Credentials for Auto Logon
Update the credentials used for auto logging on the User account:
Configuring Custom Shell for User Account
Refer to one of my earlier posts here:
Configuring a custom shell launcher with VMware Horizon View Client on a Dell Wyse 7020 Windows 10 IoT device
https://blog.terenceluk.com/configuring-custom-shell-launcher-with/
Preparing Image for Capture
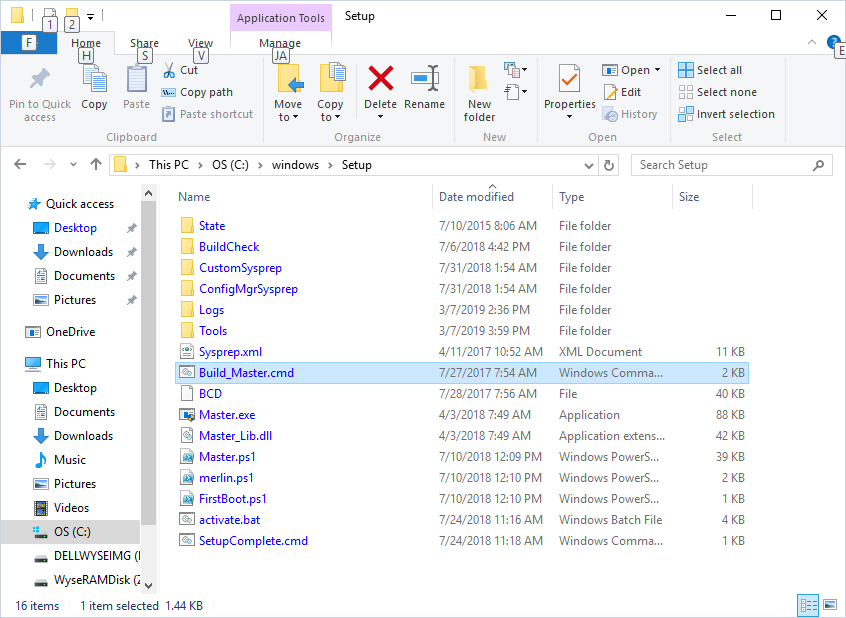
Execute the Build_Master.cmd in the C:WindowsSetup folder on the thin client to start the capture wizard:
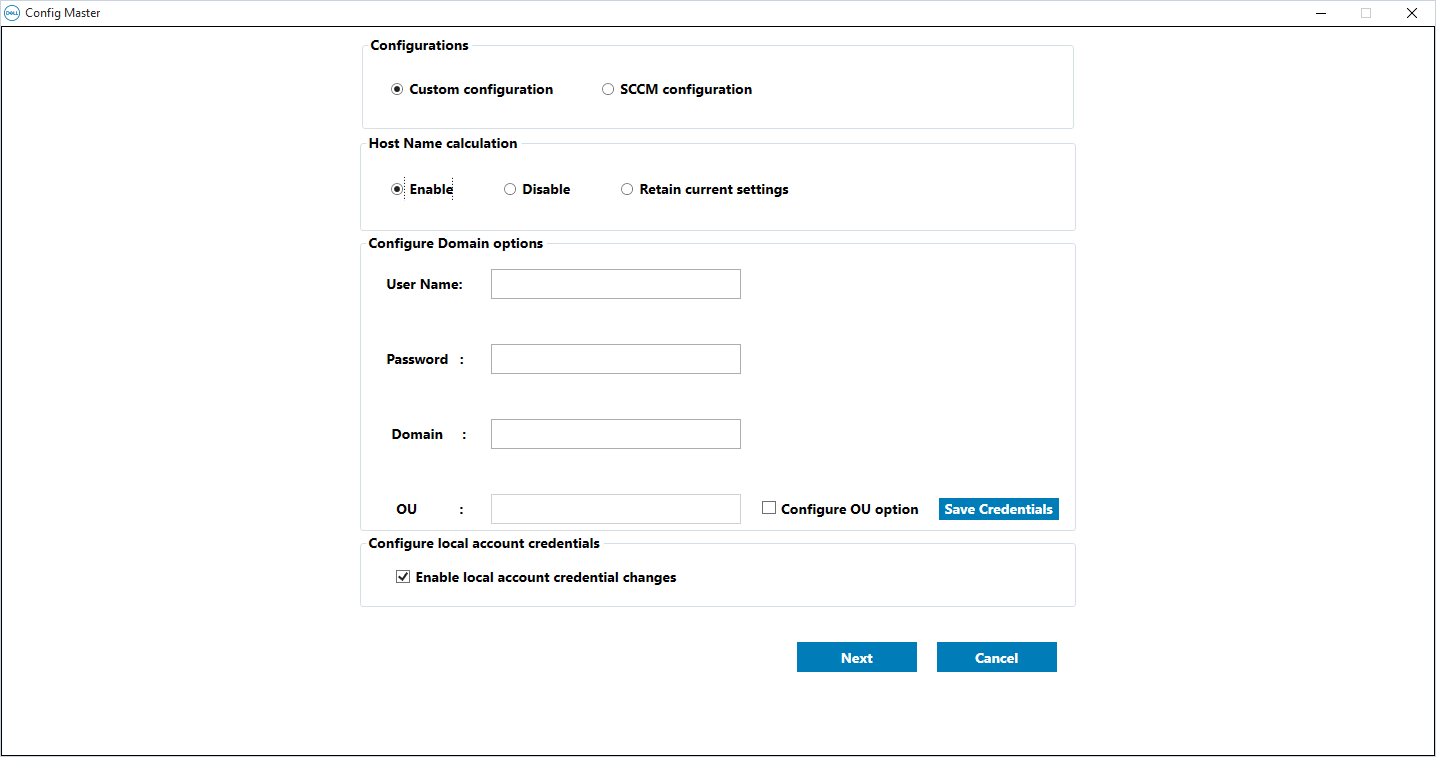
Fill in the appropriate settings and select the Enable local account credential changes under the Configure local account credentials heading to configure the password for the admin and user account.
Note the following settings that do not end up getting retained after the image preparation:
- The name of the Windows OS does not change
- The Power Scheme configuration will be reverted back to defaults (monitor and computer would go to sleep)
More information about the Custom Sysprep tool can be found here: https://www.dell.com/support/manuals/us/en/04/wyse-7020/wie10_th_mr4/running-custom-sysprep-tool?guid=guid-5bd77921-f2e6-4c84-b55f-dbffddc1a89f&lang=en-us
Post Image Operation
Customizations
Configure and reconfigure the following customizations that does not get retained after customization.
Configure Computer Name
Configure a unique name for the Windows 10 IoT operating system.
Set Power Plan to High Performance
Execute the following command to configure the power plan as High performance:
powercfg -setactive 8c5e7fda-e8bf-4a96-9a85-a6e23a8c635c
Turn off Display
Execute the following command to configure the high performance power plan to turn off the display after 15 minutes:
powercfg -x -monitor-timeout-ac 15
Computer Sleep Mode
Execute the following command to configure the high performance power plan to never put the computer to sleep:
powercfg -x -standby-timeout-ac 0
Prevent User from launching Internet Explorer
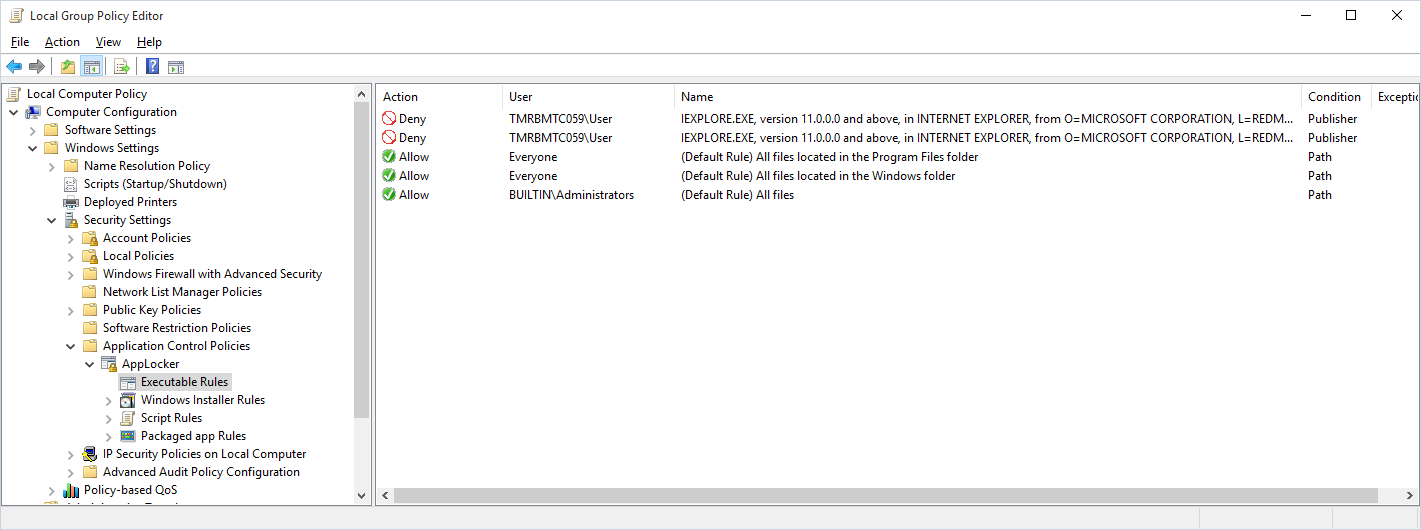
Configure the following AppLock rules for the local computer policy to prevent the user from launching Internet Explorer. Note that this may be able to be bundled into the prebuild but I was not able to test to see if this is retained after the image prep process.
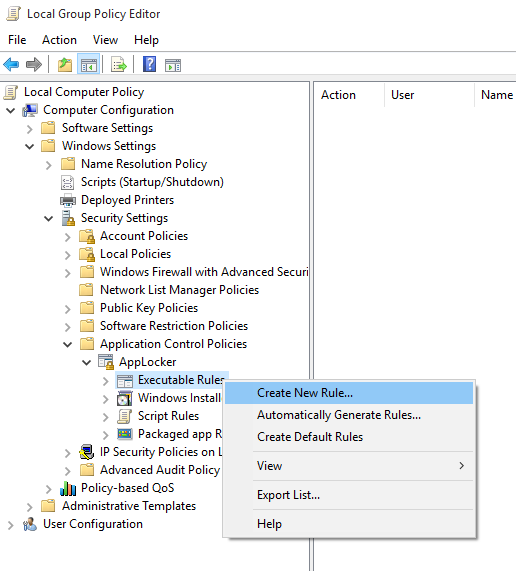
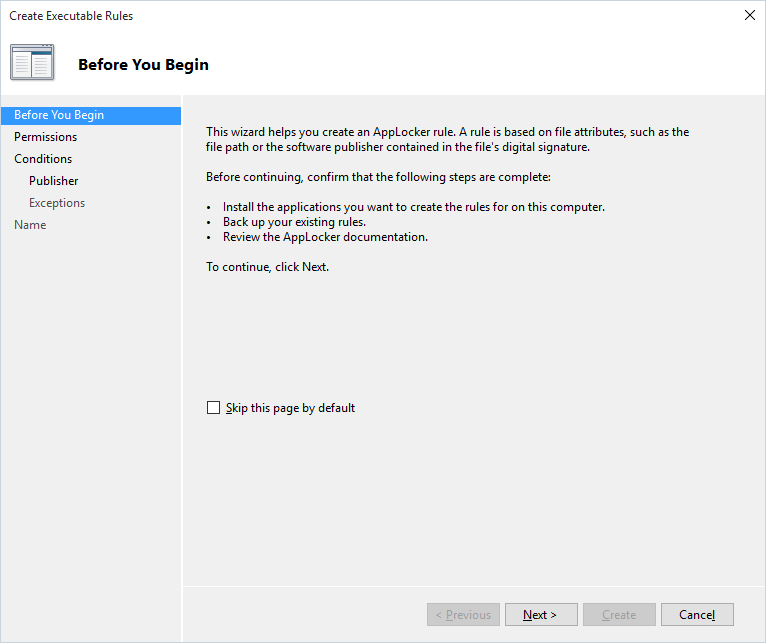
Launch GPEdit.msc and navigate to Computer Configuration > Windows Settings > Security Settings > Application Control Policies > AppLocker > Executable Rules > Create New Rule…:
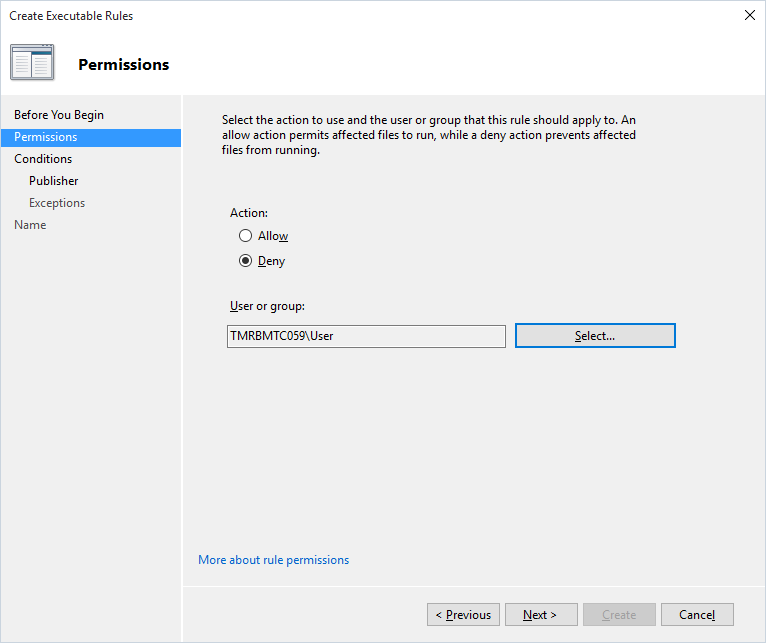
Configure the local User with the Action as Deny:
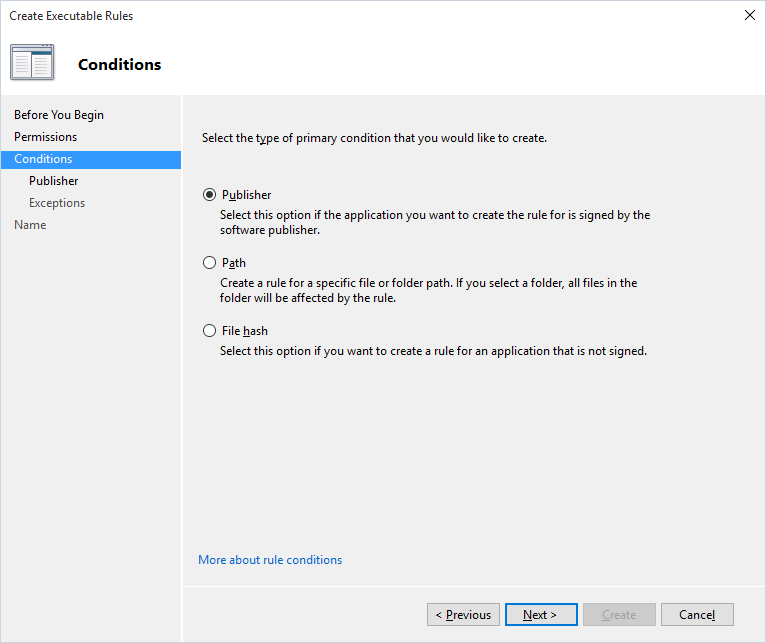
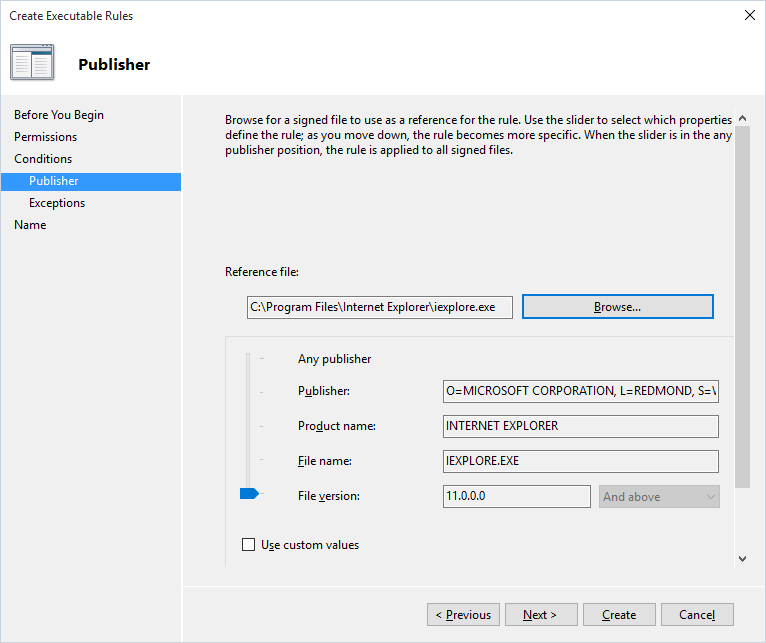
I haven’t had any luck using Path as the Condition so select Publisher:
Click on the Browse button and locate the 32 or 64-bit version of Internet Explorer:
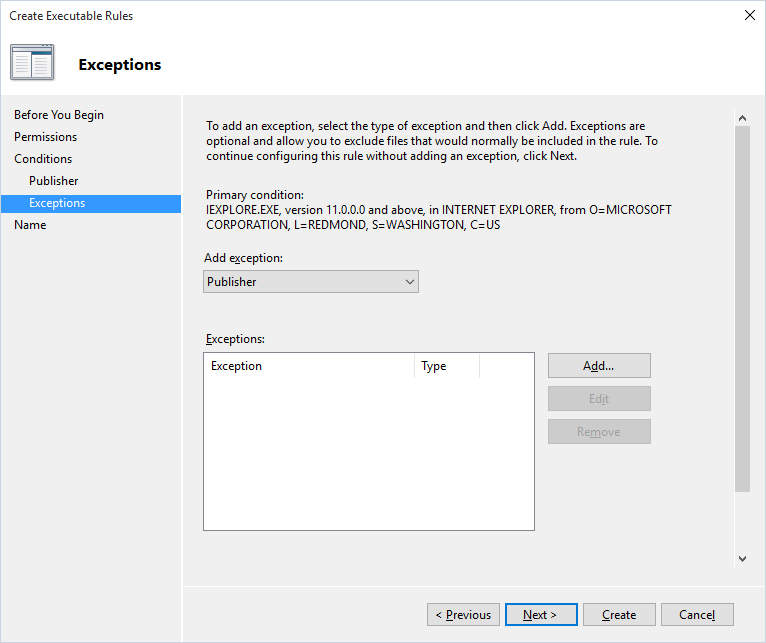
There will not be a need for Exceptions so proceed to the next page:
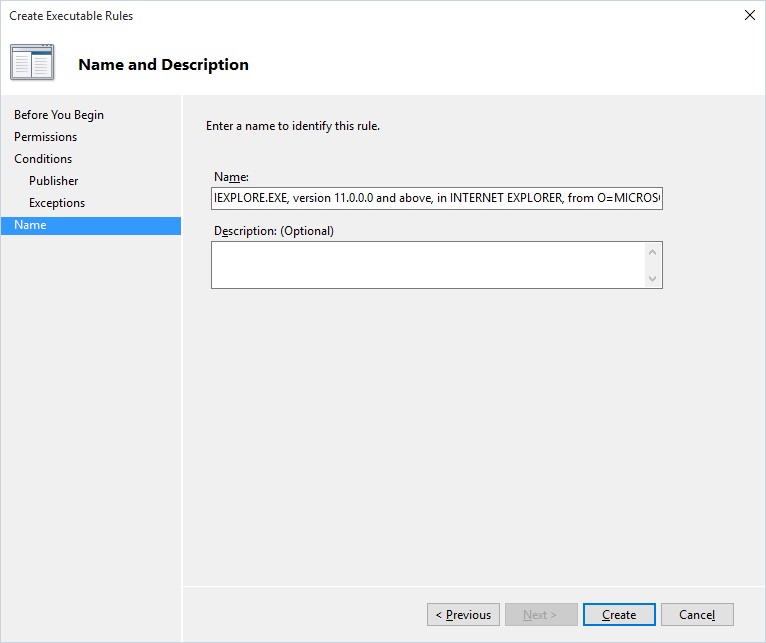
Leave the name as the default and complete the creation:
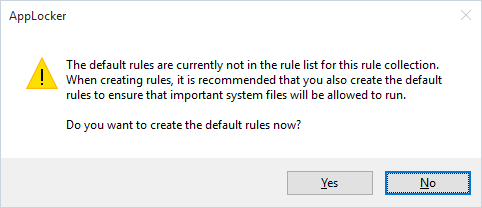
Select Yes to create the default rules:
**Repeat the same for the 32 or 64-bit Internet Explorer.
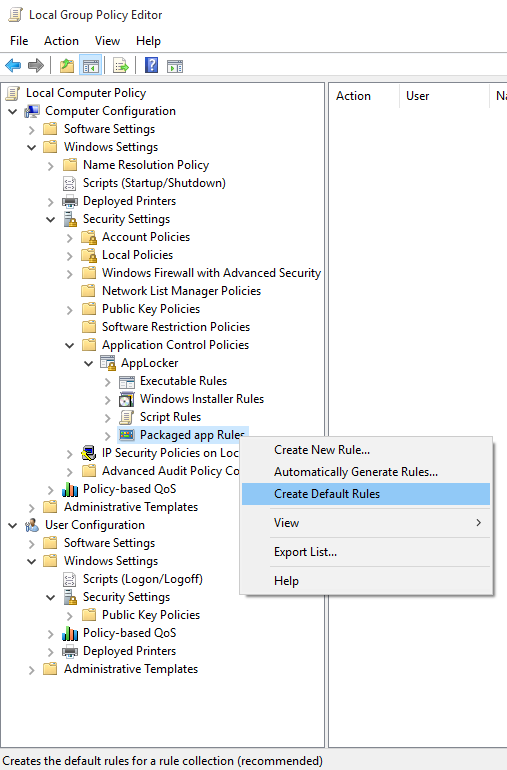
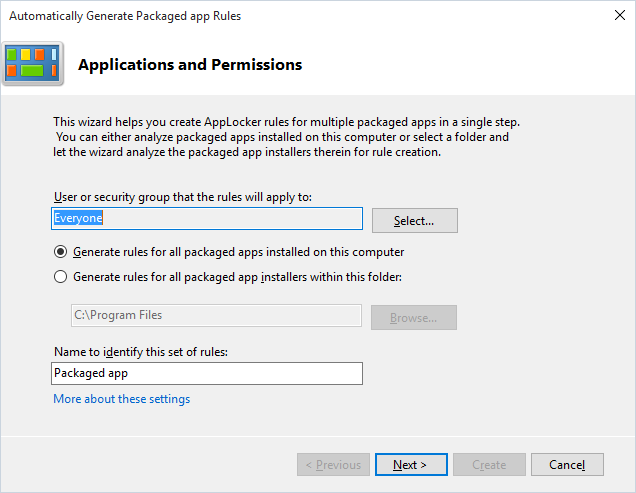
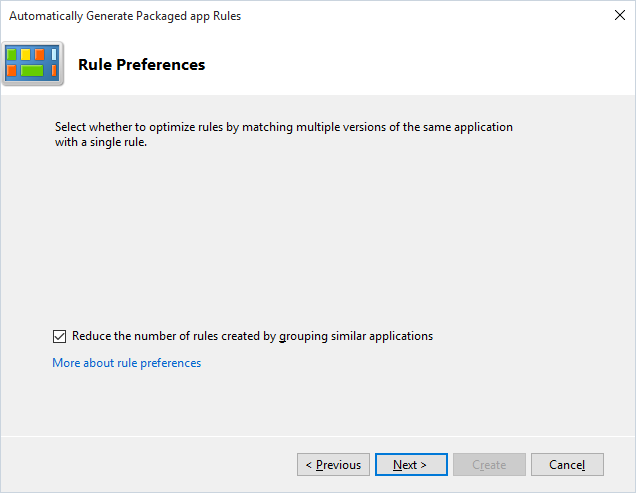
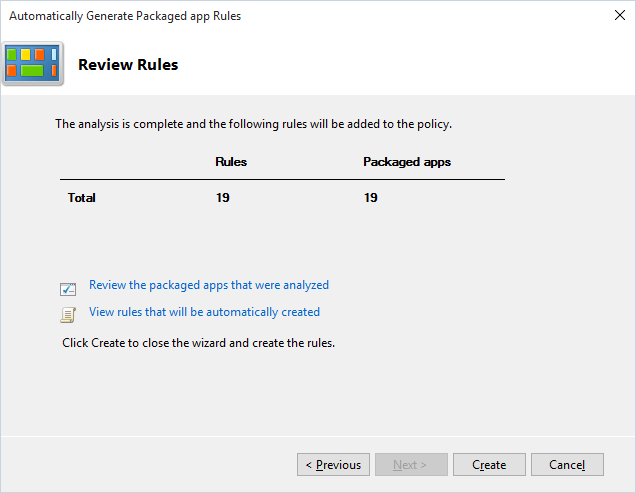
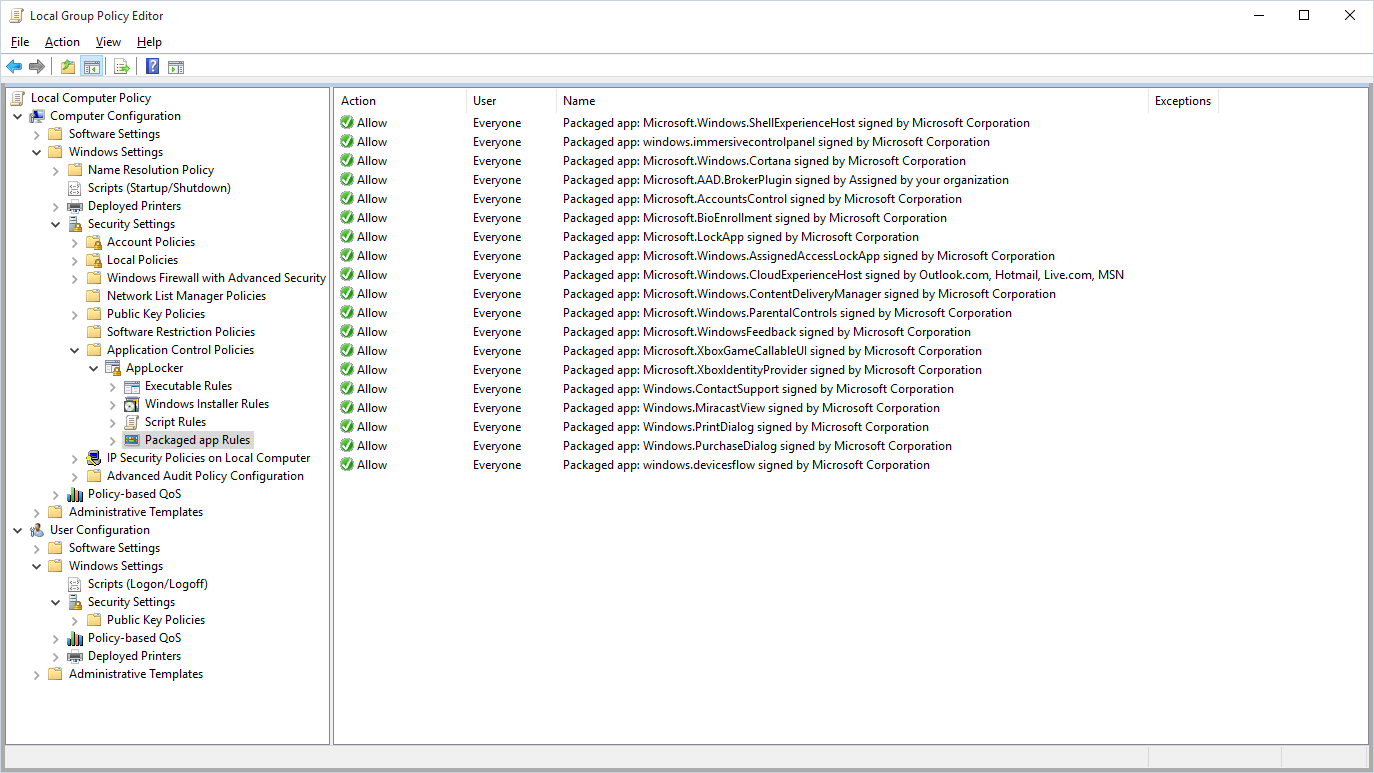
Proceed and create the default rules for the Packaged app Rules:
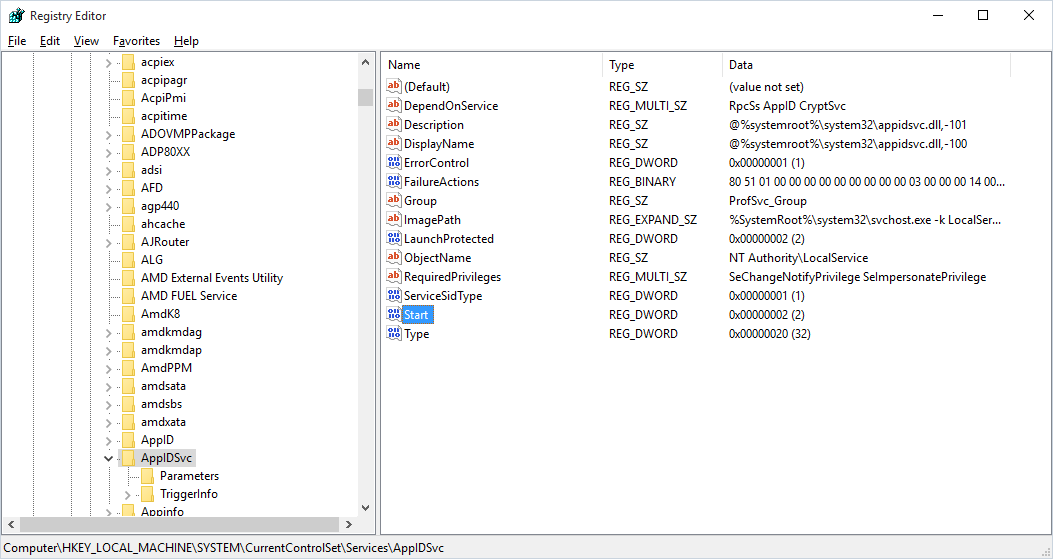
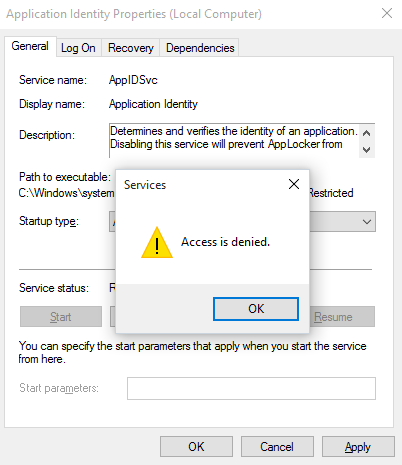
Force the Application Identity service to automatically start by editing the following registry key (if this isn’t started then AppLocker will not work:
Windows Registry Editor Version 5.00
[HKEY_LOCAL_MACHINESYSTEMCurrentControlSetServicesAppIDSvc]
“Start”=dword:00000002
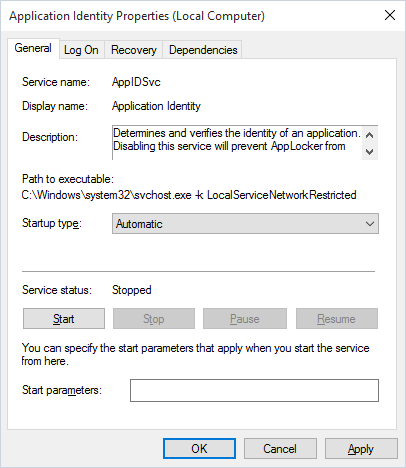
Note that would receive an Access is denied error if you attempt to manually configure this in the services console:
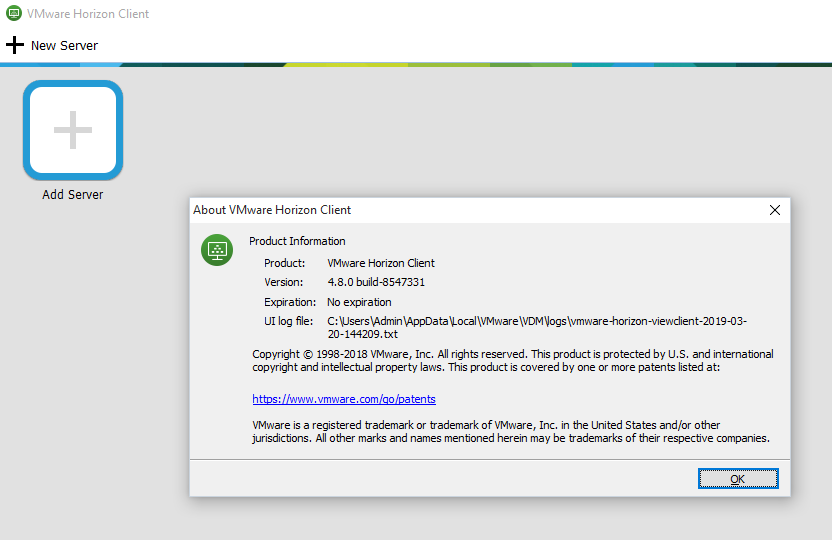
Having the above configured will prevent users from launching IE via the About VMware Horizon Client window:
Notes
Limitations
The following are items that need to be highlighted as the build can be improved on but were left out due to the amount of time available for the initial build.
Host name generation
The feature Host Name calculation is supposed to generate a new name for the Windows 10 IoT OS but it does not:
Power Scheme Settings
It should be possible to place the power scheme commands in the scripts that are executed at the end of the preparation but this requires time to identify and test.
Preparation Finalization
The initial build of the image does not complete automatically because the final steps requires the Windows shell but the customization of the User account to be shell-less means the administrator needs to manually log into the thin client as the admin account so the finalization can complete.
AppLocker Configuration
The AppLocker configuration can be included into the base image but due to time constraints, it was not added in.
Further Security Lockdown
AppLocker can be further configured to disable other applications that may be able to be launched within the shell but will require additional time.



One Response
Great write up of the steps taken!