I’ve been meaning to write a blog post about an interesting challenge I faced a few months ago while doing a hardware refresh for a client with their Exchange 2007 environment. They had one hub transport server that was on older hardware and had purchased two new servers to provide redundancy which gave us the opportunity to plan and design the changes required. I won’t go into the details of the other aspects of the project but as I was building the new hub transport servers, I noticed that they had a few receive connectors to get moved. I did not foresee that to be a problem initially until I opened up the properties and saw lists of 40+ IPs in the Receive mail from remote servers that have these IP address list under the Network tab.
There were three of these Receive Connectors so it was very time consuming to recreate these for each server. So in the case of these 2 hub transport servers, that would be 3 receive connectors each with, say 40 remote server IPs, which would equate to 2 x 3 x 40 = 240 entries!
Since I was sure there had to be some way of making this easier, I went ahead and posted a question on our Microsoft Support forum to see if what response I would get. While I did get a solution, it’s not as easy as I thought it would be so the following shows exactly what needs to be done:
Step #1 – Exporting the information
Open up Exchange Management Console and navigate to the Receive Connectors window and write down the name of the receive connector you would like to export.:
You can also use PowerShell to list the connectors with the command:
Get-ReceiveConnector
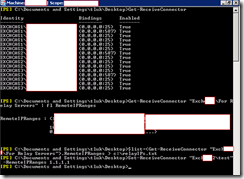
[PS] C:Documents and SettingstlukDesktop>Get-ReceiveConnector
Identity Bindings Enabled
——– ——– ——-
EXCH1Default EXCH1 {0.0.0.0:25} True
EXCH1Client EXCH1 {0.0.0.0:587} True
EXCH1Imail {0.0.0.0:25} True
EXCH1For Relay Servers {0.0.0.0:25} True
EXCH2Default EXCH2 {0.0.0.0:25} True
EXCH2Client EXCH2 {0.0.0.0:587} True
EXCH2For Relay Servers {0.0.0.0:25} True
EXCH2mail {0.0.0.0:25} True
EXCHCAS3Default EXCHCAS3 {0.0.0.0:25} True
EXCHCAS3Client EXCHCAS3 {0.0.0.0:587} True
EXCHCAS3For Relay Servers {0.0.0.0:25} True
Now to get the list of IPs allowed to relay off of this connector, we can execute the cmdlet: Get-ReceiveConnector “ServerNameReceiveConnectorName” fl RemoteIPRanges.
Note that the reason why I used quotes is because the receive connector I was working with had spaces in the name.
[PS] C:Documents and SettingstlukDesktop>Get-ReceiveConnector “EXCH1For R
elay Servers” fl RemoteIPRanges
RemoteIPRanges : {10.1.1.77, 10.10.1.93, 10.1.1.101, 10.10.1.211, 10.10.128.42,
10.1.18.41, 10.1.4.72, 10.1.1.89, 10.1.4.73, 10.10.23.42, 10.
10.23.55, 10.10.23.43, 10.1.18.31-10.1.18.34, 10.10.23.31-10.1
0.23.44, 10.5.128.27, 10.10.128.5…}
[PS] C:Documents and SettingstlukDesktop>
As shown in the output above, the RemoteIPRanges output gets truncated when the list has more than 16 entries which means if the list has less than 16, you’re set to go but if you have more then you’ll have to continue on with the following:
To get a full list of the IPs for a receive connector that contains more than 16 entries, you can issue the following cmdlet to dump the information into a text file:
$list=(Get-ReceiveConnector “ServerNameReceiveConnectorName”).RemoteIPRanges > c:relayIPs.txt
In the case of the environment I was working in, you would execute:
[PS] C:Documents and SettingstlukDesktop>$list=(Get-ReceiveConnector “Exch1For Relay Servers”).RemoteIPRanges > c:relayIPs.txt
[PS] C:Documents and SettingstlukDesktop>
After executing this command and opening up the text file, you’ll see something like this:
Not exactly what we wanted but this is apparently the best we can get from using PowerShell so with a little work in your preferred editor (in my base, I use Excel), you can reorganize the information and remove unneeded lines to format the IPs as such:
x.x.x.x,x.x.x.x,x.x.x.x….
Step #2 – Importing the information
Once you have the information formatted appropriately, all you need to do now is use the cmdlet: Set-ReceiveConnector “newServerNamenewReceiveConnector” –RemoteIPRanges xxxx,xxxx,xxxx…
…to enter the IPs. Here’s what the process would look like if I was going to add these IPs to a receive connector named “Test”:
Execute the cmdlet to set the allowed IP:
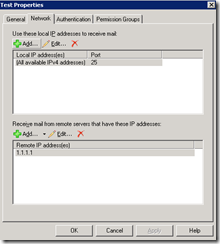
[PS] C:Documents and SettingstlukDesktop>Set-ReceiveConnector “Exch2test” -RemoteIPRanges 1.1.1.1
Open up the receive connector to confirm that the IP has been set:
It’s not as simple as I thought but at least this makes the process less painful than copying and pasting all the entries.


10 Responses
Very Useful !! – I think you're missing the 'pipe' operator "|" though between end of connector name and the format list ?
Should it be Get-ReceiveConnector “ServerNameReceiveConnectorName” | fl RemoteIPRanges. ?
Worked great after i put this in just atypo most likely – Just what I needed though, Thanks Konrad
Excellent information certainly helped me 🙂
Keep it up
Surj
Hi,
where you pointing the exported file to import?
in your blog, you said to add only one IP address. Can't we add all the ipaddress pointing to export file
Devi
After reading this I did some tinkering to end up with:
Export:
Get-ReceiveConnector -server [source server] | fl remoteipranges,identity,authMechanism,PermissionGroups
This resulted in the export of all six connectors we were using in the format:
RemoteIPRanges : {xxx.yy.27.133, xxx.yy.0.10, xxx.yy.32.94, xxx.yy.0.24}
Identity : [server][connector name]
AuthMechanism : Tls, ExternalAuthoritative
PermissionGroups : ExchangeServers
I could have put that into a text file but viewing in the EMS was fine. I then had to manually substitute this info into commands that looked like
C:Windowssystem32>New-ReceiveConnector -Name ConnectWise -Bindings 0.0.0.0:25 -RemoteIPRanges xxx.yy.27.133,xxx.yy.10,xxx.yy.32.94,xxx.yy.0.24 -AuthMechanism Tls,ExternalAuthoritative -PermissionGroups AnonymousUsers
Some notes:
* When I exported, Custom was sometimes listed as a PermissionGroup but that isn't valid when importing.
* I went to the EMC to refresh and spot check. I then exported from the new server and spot checked there.
Thanks for you post, it enlightened me.
I came up with this approach
https://robertodimas.wordpress.com/2013/06/27/copyexport-exchange-2010-receive-connectors-to-a-new-server/
Roberto
I took a lot of your helpful information and wrote a script that does the job…
function TransferReceiveConnectors {
$SourceServer = "SRV-Mail"
$DestinationServer = "SRV-Mail01"
$SourceReceiveConnector = ForEach-Object {Get-ReceiveConnector -Server $SourceServer}
ForEach ($Connector in $SourceReceiveConnector)
{
New-ReceiveConnector -Name $Connector.Name -Server $DestinationServer -Bindings $Connector.Bindings -AuthMechanism $Connector.AuthMechanism -PermissionGroups $Connector.PermissionGroups -RemoteIPRanges $Connector.RemoteIPRanges
}
}
Of course, change your source and destination servers as needed… Then call the function by simply typing TransferReceiveConnectors from the powershell command line.
Simpler solution:
$list=(Get-ReceiveConnector "Exch1For Relay Servers").RemoteIPRanges
Set-ReceiveConnector "Exch2For Relay Servers" -RemoteIpRanges $list
Nigel Benfell is the man.
Excelent work!
But what if you want to move ip-ranges from one connector to another? Is there a way to delete the ip-range from the old connector, because you cannot bind the ip-range to two different connectors on the same exchange server ?
Would be nice if we could find OCSASNFIX. Microsoft removed it from there site 🙁