Shortly after publishing the following post where I demonstrated how to create a web application with .NET Core to upload files to a storage account, which will leverage Defender for Storage and a Logic App to scan the file for virus and proceed to set metadata tags and copy it to another storage account for indexing by AI Search:
Creating a web application with .NET Core for uploading files into an Azure Storage Account
… I was asked by a colleague whether it was possible to use SharePoint rather than a custom developed site. This is absolutely possible so I decided to write a short and less “configuration step-by-step” detailed post to demonstrate what the Logic App configuration would look like.
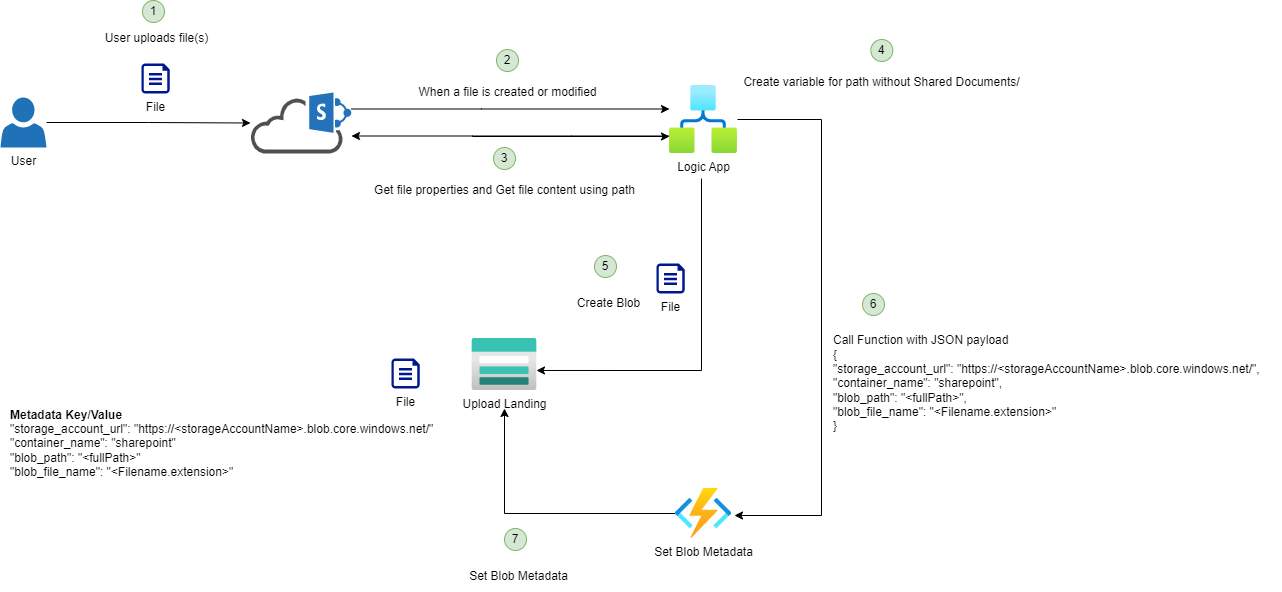
The following is what the topology and flow of events would look like:
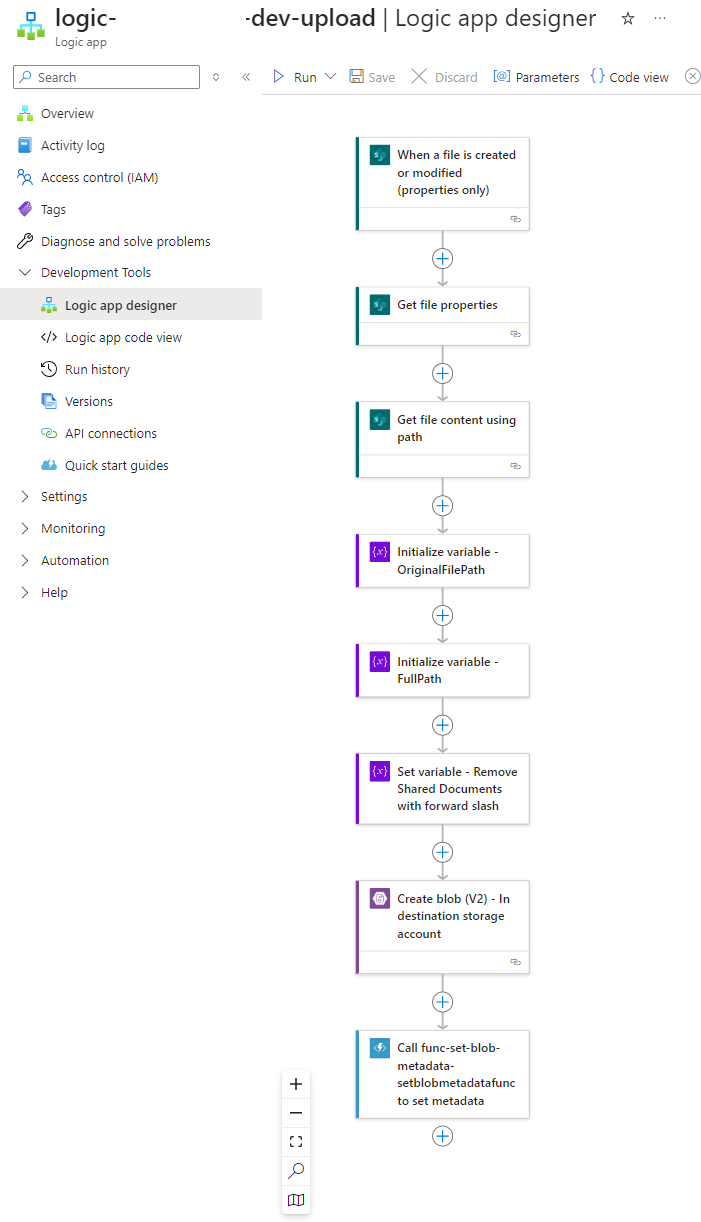
The following is what the Logic App configuration would look like:
I won’t go through the step-by-step configuration but I’ll open up each step to demonstrate the configuration.
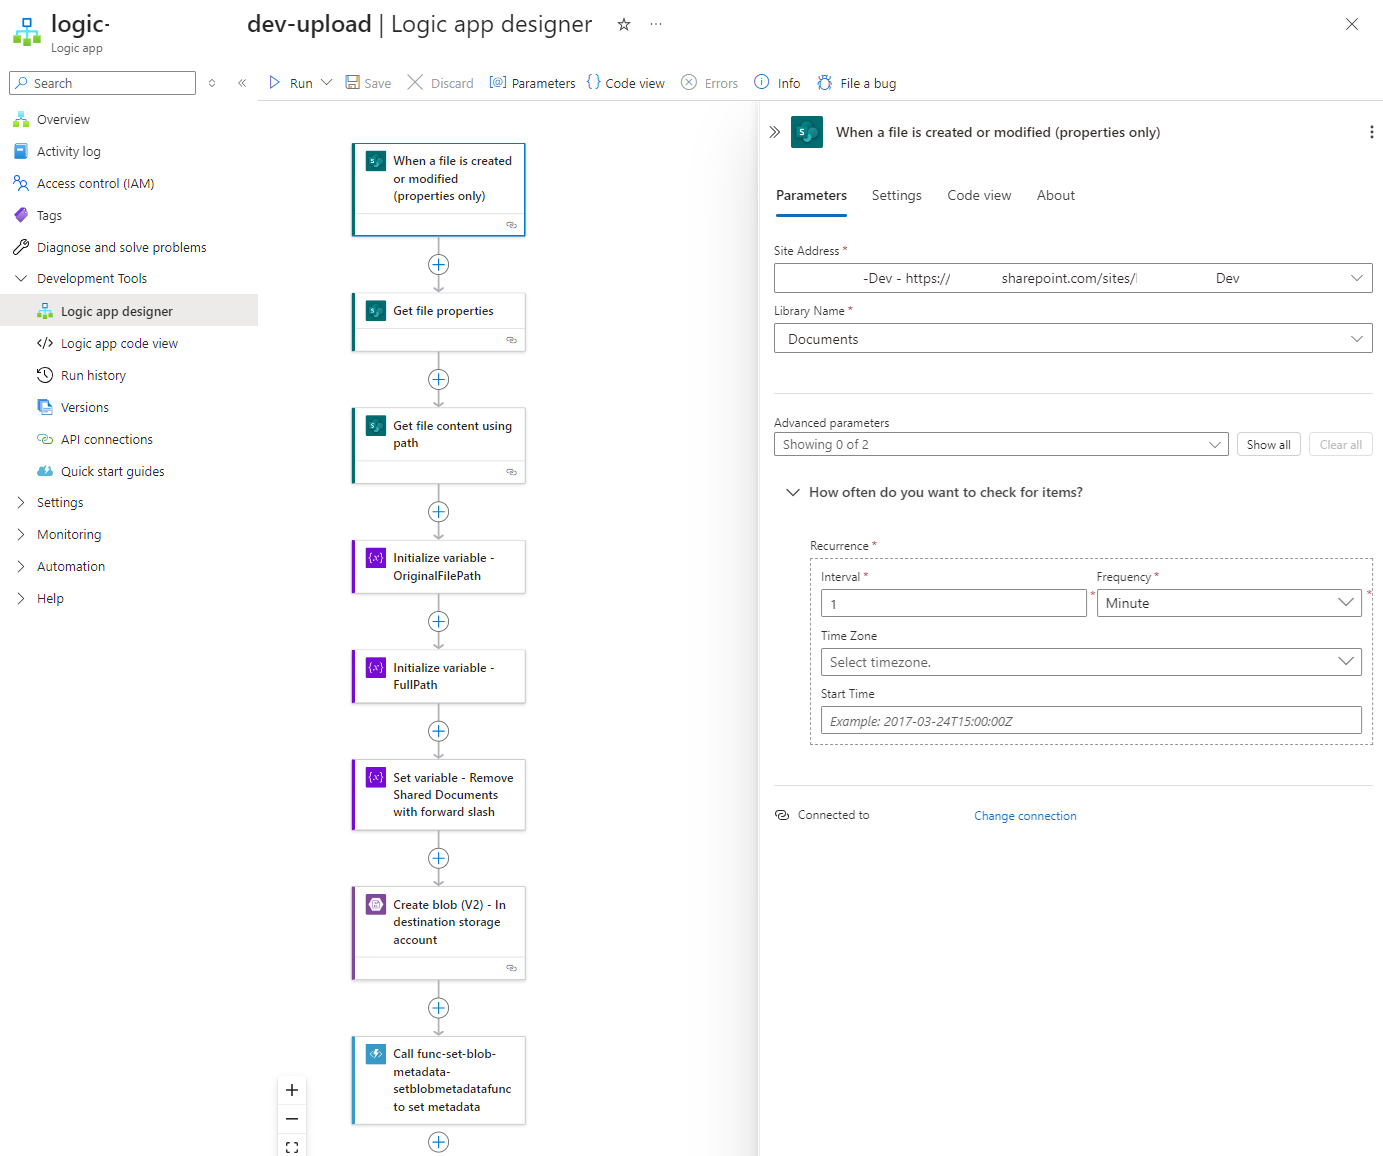
Step #1: Trigger Logic App when a file is uploaded to the SharePoint site
Begin by creating a trigger with When a file is created or modified (properties only) and configure the Site Address to the SharePoint site we’ll be uploading files to, the Library Name name to where the documents are stored, and the Recurrence settings for how frequent this Logic App should be checking for items on the SharePoint site. The options for Frequency are:
- Month
- Week
- Day
- Hour
- Minute
- Second
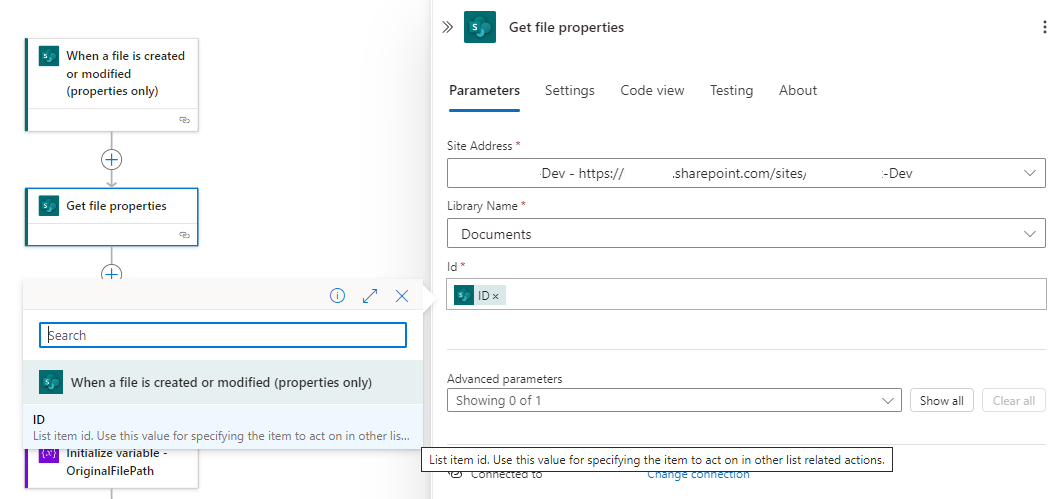
Step #2: Get the uploaded file’s properties
Next, we’ll need to get the file properties of the file that was uploaded to SharePoint with the Get file properties action. Configure the Site Address to the SharePoint site we’ll be uploading files to, the Library Name name to where the documents are stored, and the Id setting as the previous trigger’s output:
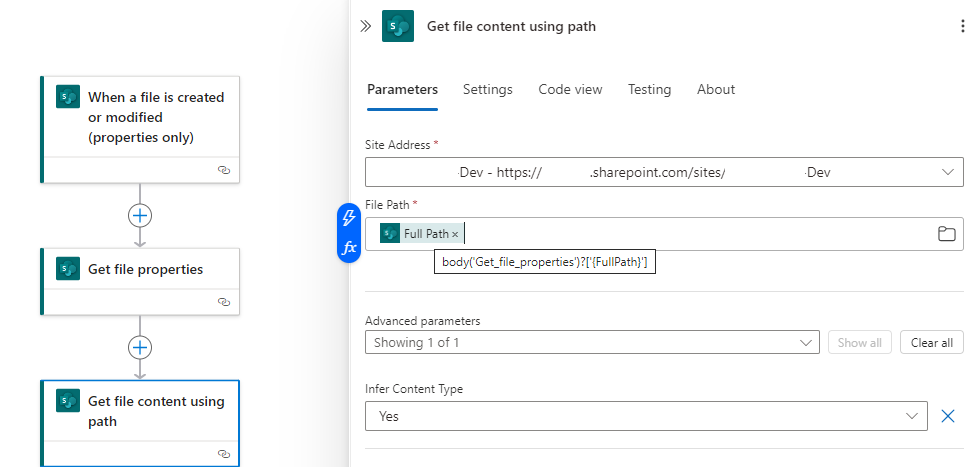
Step #3: Get the file content using the path to the file
Now that we’ve retrieved the file properties, we will get the file content of the file that we’ll be using to create the blob on the storage account:
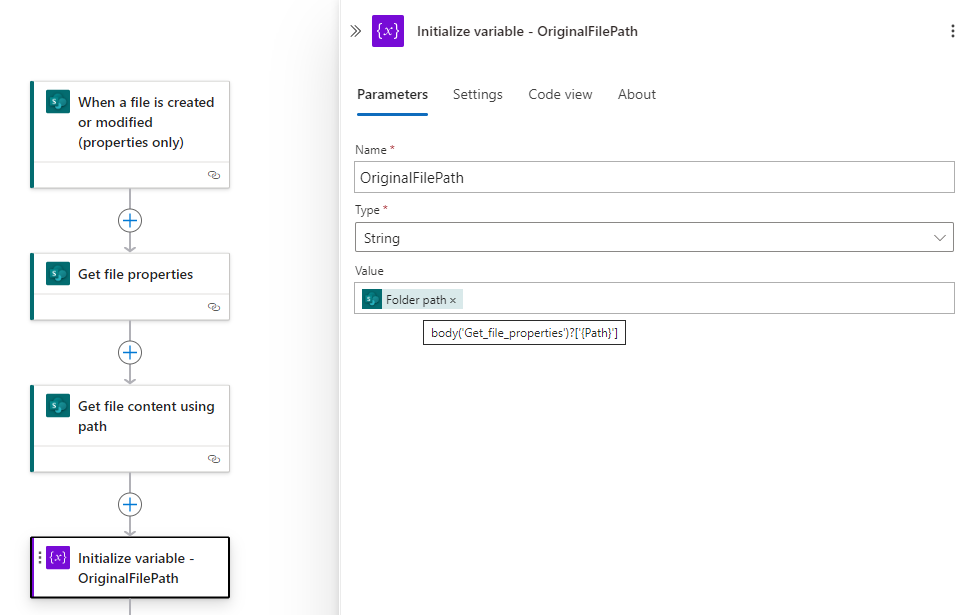
Step #4: Initialize a variable and store the SharePoint folder path
The folder path for SharePoint Document libraries will always be begin with:
Shared Documents/ followed with: <foldername>/<filename>
If we do nothing with the path, our Storage Account’s container will begin with Shared Documents/. This isn’t something I wanted so I will create a variable to store the full path, then modify it to remove the Shared Documents/.
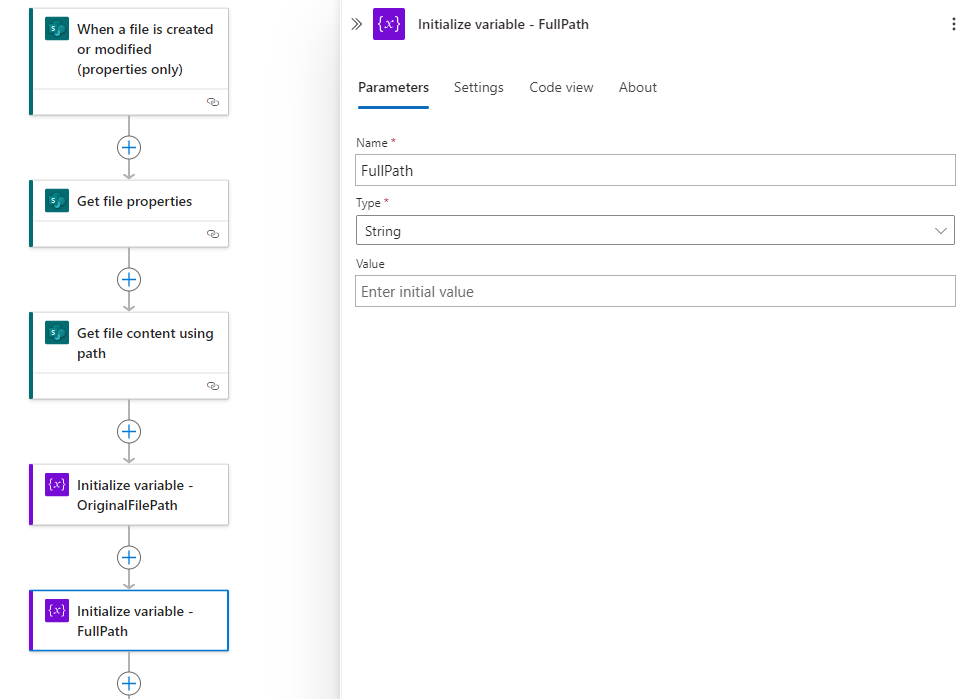
Step #5: Initialize a variable to store the desired path for the Storage Account container
The next step is to initialize a variable to store the full path we want for the Storage Account that will not have Shared Documents/:
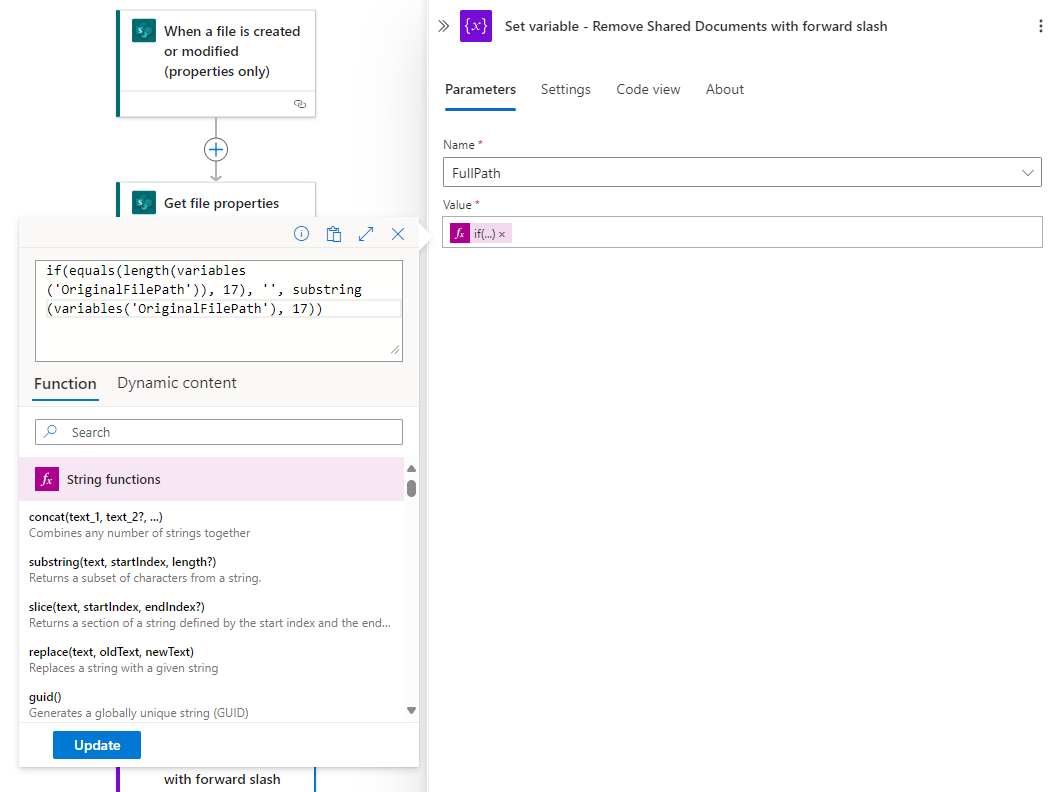
Step #6: Set the variable that will store the desired path for the Storage Account to omit the Shared Documents/ path
Now we’ll use a function to remove the Shared Documents/ path:
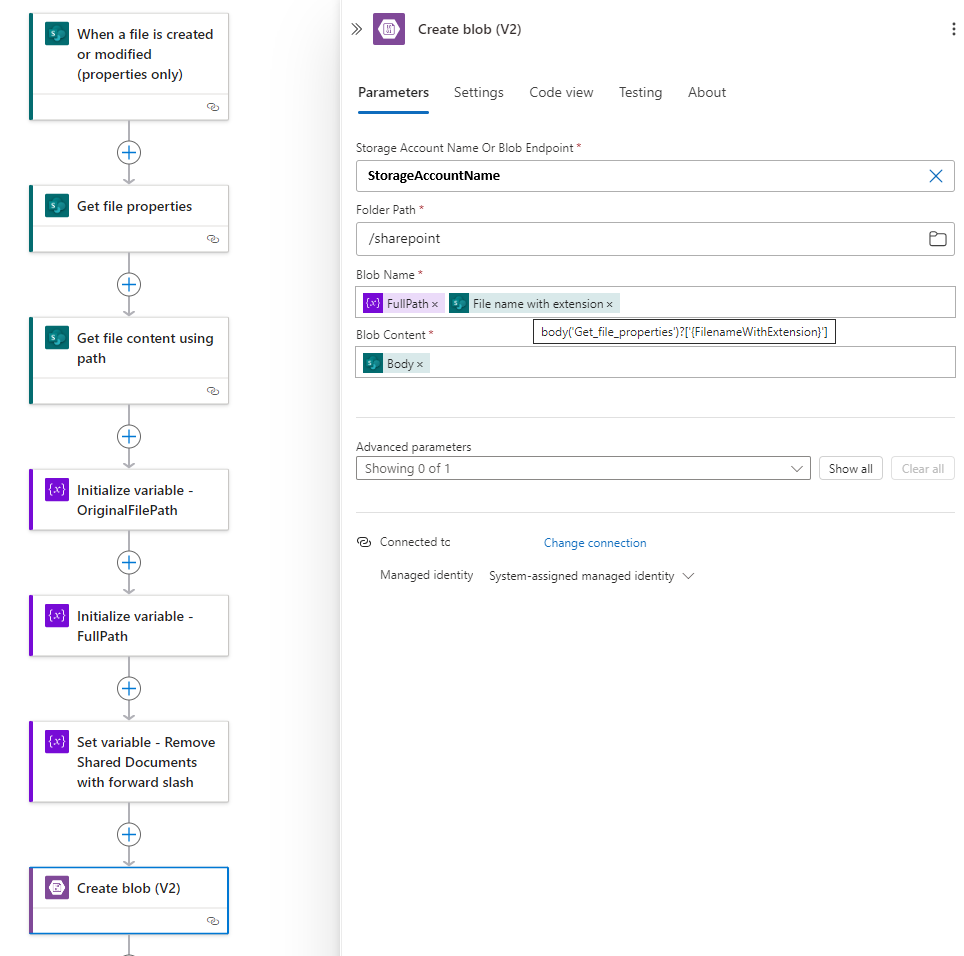
Step #7: Create the blob in the Storage Account
We can now proceed to create the blob with the uploaded SharePoint file content:
Storage Account Name Or Blob Endpoint: <Storage Account Name>
Folder Path: <Select the folder path>
Blob Name: <The full path without Shared Documents/><The File name with extension from Get file properties>
Blob Content: <The File Content from Get file content using path – note that this gets renamed to Body after saving the Logic App>
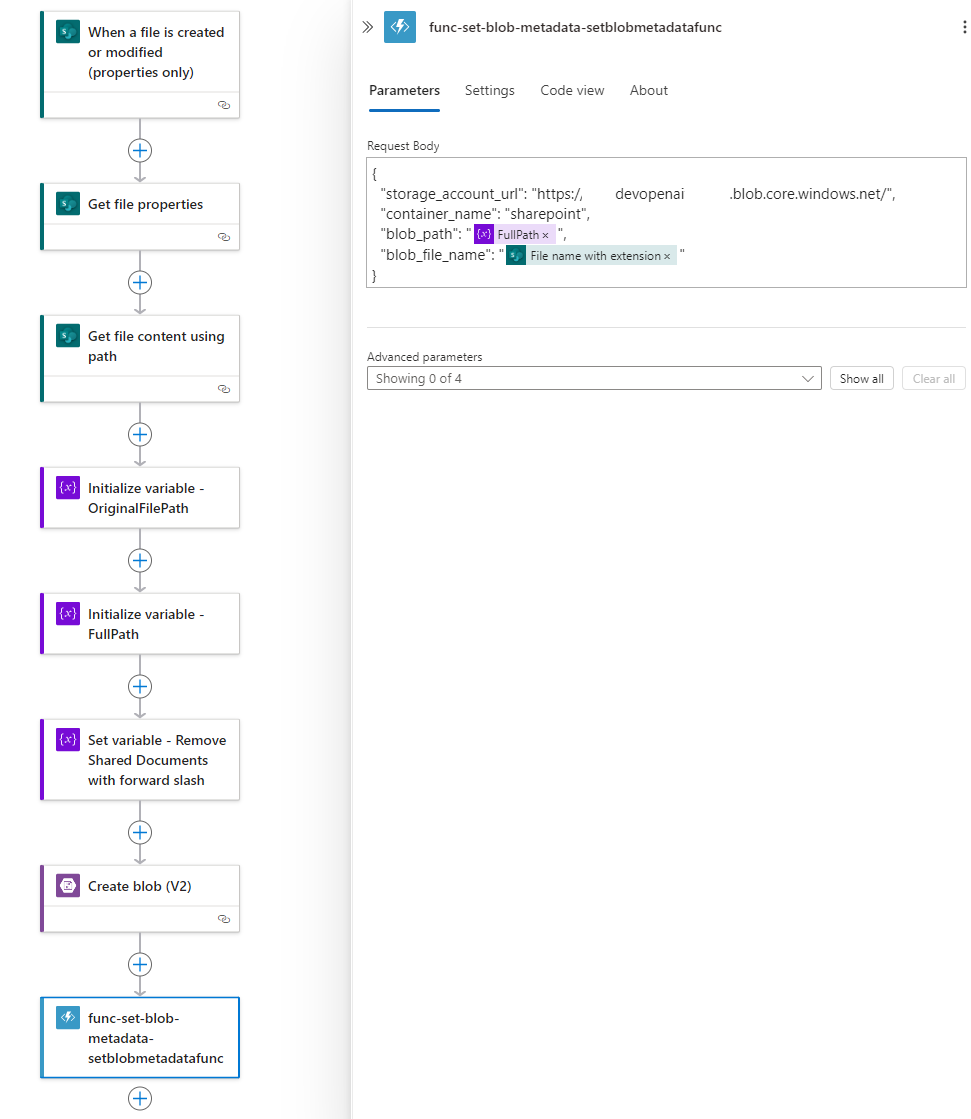
Step #8: Call the Function App that will set the metadata for the blob
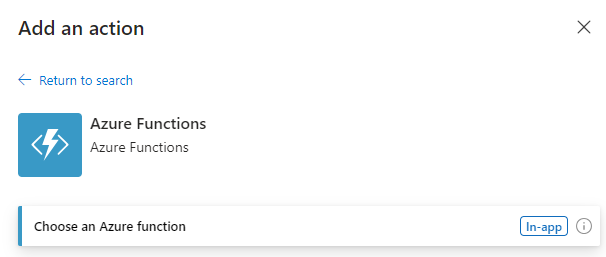
The last step is to add a Azure Function action:
Then select the Function that will set the metadata on the blob:
More information about creating such a function is described in my previous post here:
Hope this post helps anyone who may be looking for information on how to set up such a Logic App.

