This post serves as a continuation of my previous post:
Creating and AppStack with VMware App Volumes
https://blog.terenceluk.com/creating-and-appstack-with-vmware-app/
… mainly to demonstrate the process of updating an AppStack that has already been created.
Step #1 – Select the AppStack that needs to be updated
Begin by logging into the App Volumes Manager, navigate to Volumes, AppStacks, expand the AppStack that you would like to update and click on the Update button:
Provide a new name for the AppStack and select (or use the default) storage configuration:
Confirm the prompt for updating the AppStack:
Upon completion, you would now notice a new AppStack created in addition to the one that you are trying to update. What the wizard basically did was duplicate the existing AppStack to create one for you to modify hence why you had to use a new and unique name. Proceed by clicking on the Provision button:
Select the virtual machine that you’ll be using to mount this AppStack on and then update the associated application:
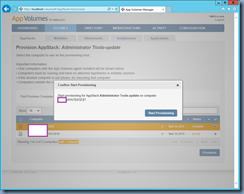
Confirm the provisioning:
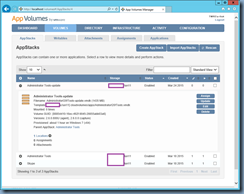
You will now be brought back to AppStack summary basically displaying the same information that would be presented if you were creating a new one:
Step #2 – Update the application
Proceed to logging onto the virtual machine that you are using for the provisioning process and install the update to the application:
The following message will be displayed:
Installation complete? System will reboot
Click YES to finish and reboot computer.
Or Click No to continue provisioning.
Proceed by clicking on the Yes button then OK:
The following message will be displayed once you have logged in after the restart:
Provisioning successful (exit code 0)
Click OK, then return to the App Volumes Manager to assign the AppStack.
Navigating back to the App Volumes Manager will show that the AppStack is now ready to be assigned:


![clip_image002[4] clip_image002[4]](https://lh3.googleusercontent.com/-qsYgPBTS5uE/VkSU4YzaSmI/AAAAAAAB7JQ/fTkuSI58qvY/clip_image0024_thumb1.jpg?imgmax=800)

![clip_image002[6] clip_image002[6]](https://lh3.googleusercontent.com/-Drx8IamKAeY/VkSVCRPZhfI/AAAAAAAB7Js/EDThXYsWh48/clip_image0026_thumb1.jpg?imgmax=800)


![clip_image002[8] clip_image002[8]](https://lh3.googleusercontent.com/-ICet0O7h14c/VkSVcA2LBHI/AAAAAAAB7K8/bdnot4gAaWk/clip_image0028_thumb1.jpg?imgmax=800)
![clip_image002[10] clip_image002[10]](https://lh3.googleusercontent.com/-T97TOYOBqfc/VkSVhSE7QQI/AAAAAAAB7LM/mfYg1iXXFQQ/clip_image00210_thumb1.jpg?imgmax=800)
![clip_image002[12] clip_image002[12]](https://lh3.googleusercontent.com/-CqIAbhkOF-4/VkSVmksa9rI/AAAAAAAB7Lc/4nq37xFznoM/clip_image00212_thumb1.jpg?imgmax=800)
![clip_image002[14] clip_image002[14]](https://lh3.googleusercontent.com/-_E9xCV1t1-o/VkSVrgbNm5I/AAAAAAAB7Lw/jXYXiyHy-F8/clip_image00214_thumb1.jpg?imgmax=800)
![clip_image002[16] clip_image002[16]](https://lh3.googleusercontent.com/-khP-6a3TnfQ/VkSVwhRcuFI/AAAAAAAB7MA/NBO63GnvjMI/clip_image00216_thumb1.jpg?imgmax=800)
![clip_image002[18] clip_image002[18]](https://lh3.googleusercontent.com/-nFzjO3Q0a5w/VkSV1iZfXDI/AAAAAAAB7MQ/RAuLpefECho/clip_image00218_thumb1.jpg?imgmax=800)


