A common web service design pattern is placing an Azure App Service behind an Azure Application Gateway so the application can be published through a central ingress point with consistent routing, inspection, and access controls. The design works well until the moment App Service Authentication is enabled and the backend suddenly starts showing as unhealthy.
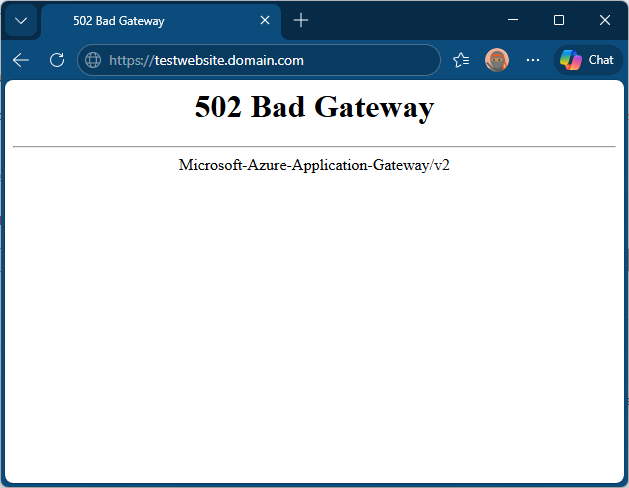
Application Gateway health probes are just HTTP requests and if the probe is sent to a path that now requires authentication, the backend stops returning a healthy response and the gateway will begin displaying 502 Bad Gateway errors when attempting to browse the site.
I wanted to create a small environment that replicates the scenario so I can demonstrate how to correctly fix this issue. What I ended up creating this GitHub repo: https://github.com/terenceluk/appgw-appservice-auth-bypass-health-check-demo where I have Terraform deploy an Application Gateway, an App Service, and file-based App Service Authentication that excludes a dedicated health endpoint from the authentication requirement.
The Challenge
When App Service Authentication is enabled, anonymous requests to protected paths are no longer treated as successful application responses. Depending on the configuration, those requests are redirected to sign-in or rejected outright. For user traffic that is exactly what we want. For an infrastructure health probe, it becomes a problem.
In this scenario, the Application Gateway probe is not a signed-in user. It is simply testing whether the backend is reachable and healthy. If the probe lands on / and / now redirects to Microsoft Entra ID, the gateway no longer receives the healthy 200 response and instead receives a 401 response:
Received invalid status code: 401 in the backend server’s HTTP response. As per the health probe configuration, 200-399 is the acceptable status code. Either modify probe configuration or resolve backend issues.
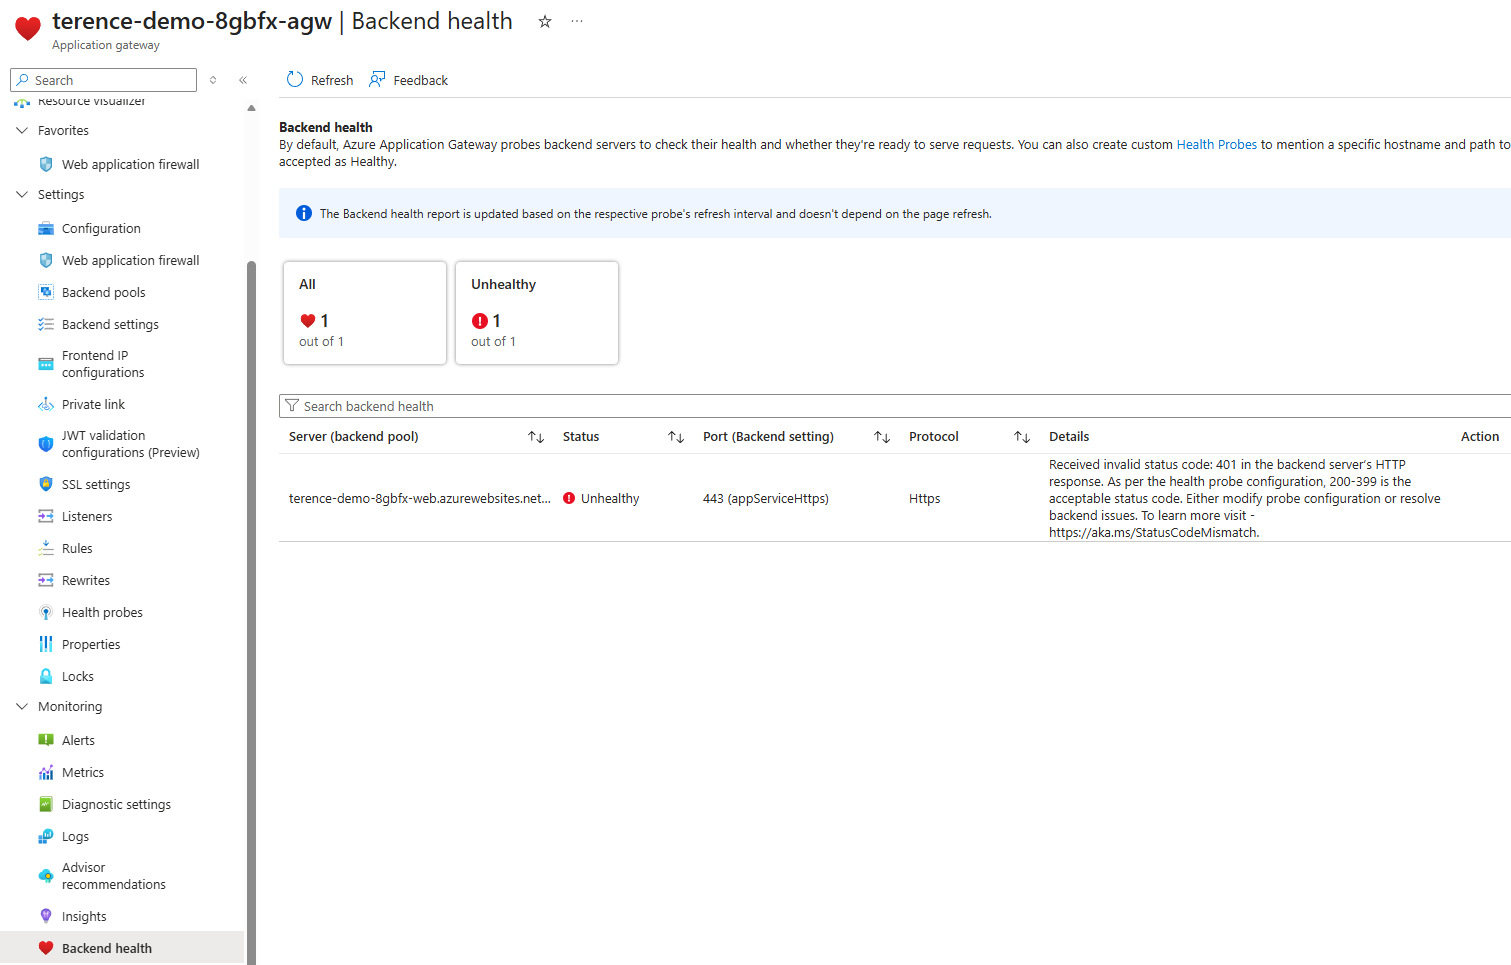
The result is that the backend will be marked unhealthy even though the application is functioning exactly as designed.
Why Not Just Accept 401 as Healthy?
Some might consider updating the Application Gateway probe to accept 401 Unauthorized as a healthy status code:
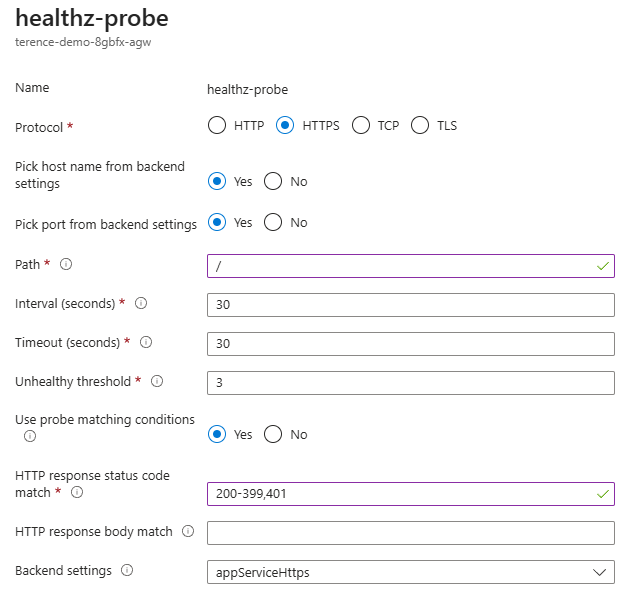
While it will work, this is not a reliable way to determine if the application is up. A 401 response indicates that App Service Authentication is properly rejecting unauthenticated requests, but it doesn’t confirm that the underlying web application is functioning correctly. The app code never receives the request, so the probe can’t verify the app’s health or logic. The proper approach is to exclude a specific health endpoint from authentication, ensuring the probe gets a genuine 200 OK directly from the functional application without compromising security.
The Target Solution
The approach I wanted for this demo had four parts:
- Deploy an Azure Application Gateway that publishes an Azure App Service.
- Turn on App Service Authentication with Microsoft Entra ID.
- Use file-based authentication configuration so I can explicitly exclude a health endpoint.
- Point the Application Gateway custom probe to that excluded endpoint.
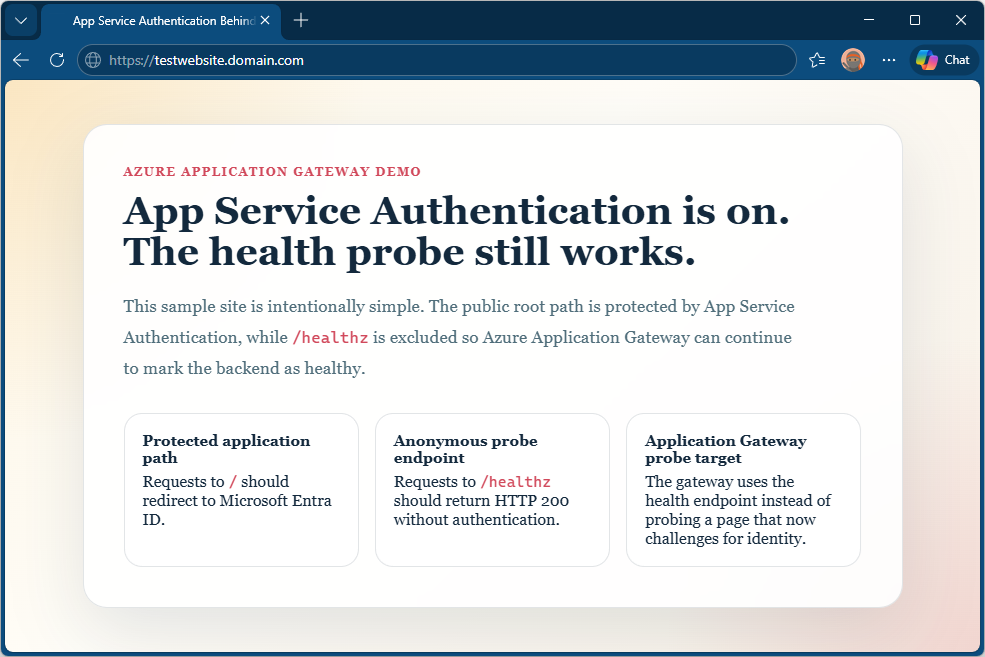
The excluded path becomes the bridge between security and availability. Users still have to authenticate to access the application, while the gateway retains a path that can answer anonymously with a simple 200 OK.
Why File-Based Authentication Configuration Matters Here
The Microsoft documentation for App Service Authentication file-based configuration is the key enabler for this scenario. Instead of capturing every authentication setting directly inside the authsettingsV2 resource, we can point App Service to a JSON configuration file by setting:
{
  "platform": {
    "enabled": true,
    "configFilePath": "/home/auth.json"
  }
}
/home/auth.json at application startup so the demo stays self-contained and the file can be built from deployment-time values such as the Microsoft Entra application client ID and issuer URL.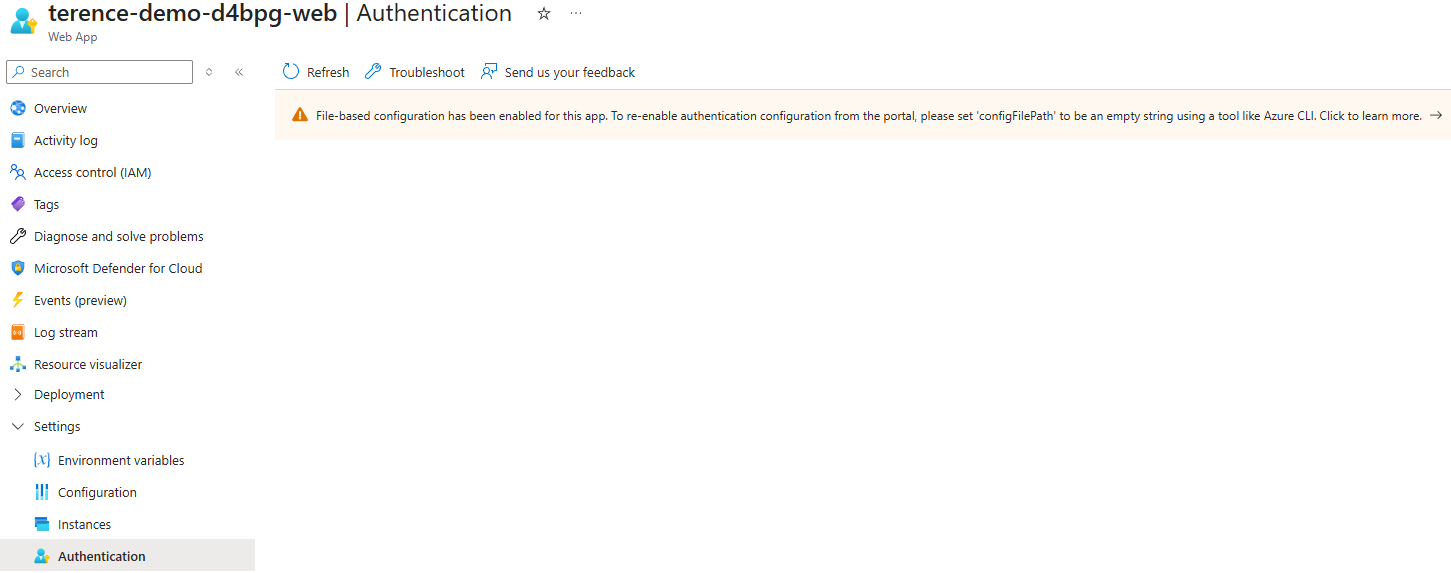
The Terraform Layout
The sample is split into two areas:
infra/contains the Terraform configuration.src/web/contains a tiny Node.js site that serves the welcome page and the health endpoint.
The Terraform code deploys the following components:
- A resource group.
- A virtual network and dedicated Application Gateway subnet.
- A Standard_v2 Application Gateway with a public frontend.
- A Linux App Service Plan.
- A Linux Web App deployed by ZIP package.
- A Microsoft Entra application registration and client secret for App Service Authentication.
- An
authsettingsV2configuration applied through the AzAPI provider.
Step 1: Build the Demo Web App
I kept the web app intentionally small because the point of the environment is to demonstrate the authentication and health probe behavior, not the application itself.
The site serves:
/as a simple welcome page.
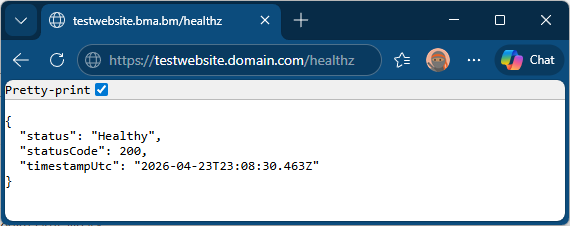
/healthzas a JSON endpoint that always returns200 OK.
The startup script reads environment variables and writes /home/auth.json from an auth.template.json file before the app begins listening for requests.
This is the key part of the startup logic:
const templatePath = path.join(__dirname, "auth.template.json");
const outputPath = "/home/auth.json";
"globalValidation": {
  "requireAuthentication": true,
  "unauthenticatedClientAction": "RedirectToLoginPage",
  "redirectToProvider": "azureactivedirectory",
  "excludedPaths": [
    "/healthz"
  ]
}
Step 2: Configure App Service Authentication with authsettingsV2
Rather than relying on the Azure portal, the sample configures the Web App auth resource directly with Terraform through azapi_resource:
resource "azapi_resource" "authsettings_v2" {
  type      = "Microsoft.Web/sites/config@2022-09-01"
  name      = "authsettingsV2"
  parent_id = azurerm_linux_web_app.main.id

  body = {
    properties = {
      platform = {
        enabled        = true
        configFilePath = "/home/auth.json"
      }
    }
  }
}
Step 2a: How the Application Is Packaged and Deployed
The web app is deployed entirely through Terraform without any separate CI/CD pipeline or manual upload step. Here is how the pipeline works end to end.
Packaging — data "archive_file"
When terraform apply runs, before any Azure API calls are made, Terraform executes the archive_file data source:
data "archive_file" "web_package" {
  type        = "zip"
  source_dir  = "${path.module}/../src/web"
  output_path = "${path.module}/build/webapp.zip"
}
src/web/ directory into infra/build/webapp.zip on your local machine. No npm install is run locally because the app has no production dependencies beyond the Node.js built-in modules, so nothing needs to be bundled.Uploading — zip_deploy_file
The azurerm_linux_web_app resource has a zip_deploy_file argument that points to the output of the archive:
zip_deploy_file = data.archive_file.web_package.output_path
/api/zipdeploy) and extracts it to /home/site/wwwroot/. If the content of the ZIP changes between runs, Terraform detects the change via the checksum and redeployes automatically.The app setting SCM_DO_BUILD_DURING_DEPLOYMENT = "false" is also set so that Kudu skips attempting to run npm install after extraction. Because the app uses only built-in Node.js modules, this saves deployment time and avoids needing network access to npm from the App Service.
Startup sequence — app_command_line
The App Service site_config specifies a custom startup command:
app_command_line = "node startup.js && node server.js"
startup.js, which reads auth.template.json from the deployment package, substitutes the environment variable tokens (client ID, issuer URL, secret setting name, health path), and writes the resolved configuration to /home/auth.json:const replacements = {
"__AAD_CLIENT_ID__": process.env.AUTH_AAD_CLIENT_ID,
"__ALLOWED_AUDIENCE__": process.env.AUTH_ALLOWED_AUDIENCE,
"__OPENID_ISSUER__": process.env.AUTH_OPENID_ISSUER,
"__CLIENT_SECRET_SETTING_NAME__":"AAD_CLIENT_SECRET",
"__HEALTH_PATH__": process.env.HEALTH_PATH
};
server.js start and begin accepting requests. This ordering guarantees that the App Service Authentication configuration is in place before any traffic can reach the application.Environment variables
All values the startup and server scripts need are injected as App Service app settings controlled by Terraform:
| App Setting | Purpose |
|---|---|
AUTH_AAD_CLIENT_ID |
Entra application client ID for authentication |
AUTH_OPENID_ISSUER |
Entra OpenID Connect issuer URL |
AAD_CLIENT_SECRET |
Client secret for the Entra application |
HEALTH_PATH |
Path exempt from authentication (default /healthz) |
HEALTH_STATUS_CODE |
Status code returned by the health endpoint |
SCM_DO_BUILD_DURING_DEPLOYMENT |
Set to false to skip npm install on deploy |
Because these values are managed by Terraform, changing any of them and running terraform apply will update the App Service app setting and trigger a restart automatically.
Step 3: Configure the Application Gateway Probe Correctly
The Application Gateway backend is configured to use the App Service hostname, and the custom probe targets /healthz over HTTPS.
This is the important part of the probe definition:
probe {
  name                                      = "healthz-probe"
  protocol                                  = "Https"
  path                                      = "/healthz"
  pick_host_name_from_backend_http_settings = true

  match {
    status_code = ["200-399"]
  }
}
- The path points to the endpoint excluded from authentication.
- The probe uses the backend host name expected by the App Service.
Without the correct host name, App Service can fail the request for an entirely different reason. Without the excluded path, the probe will be challenged by authentication.
Step 4: What This Allows You To Demonstrate
Once deployed, this environment can demonstrate both the failure mode and the corrected configuration.
The easiest sequence is:
- Deploy the sample as written and confirm the Application Gateway backend is healthy.
- Browse to the gateway root and verify that the request is redirected to Microsoft Entra sign-in.
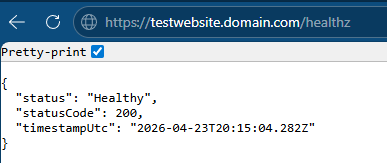
- Browse to
/healthzand verify that the endpoint returns200 OKanonymously. - Simulate a probe failure by changing
HEALTH_STATUS_CODEto a non-2xx value. If you change it through Terraform, runterraform apply. If you change it directly in App Service settings, save the change and restart the app. The backend will be marked unhealthy even though authentication is not involved. - Restore the status code to
200to bring the backend back to healthy.
That gives you a clean before-and-after demonstration of both the authentication exclusion and the status code effect on probe health.
Step 5: Simulate the Health Probe Failure Using an Environment Variable
The demo web app reads a HEALTH_STATUS_CODE environment variable at startup. When the value is a 2xx code the probe returns healthy. When it is anything outside that range the gateway marks the backend down. This means you can demonstrate the failure and the fix without touching the authentication configuration at all, which helps keep the two concepts distinct during a walkthrough.
If you want Terraform to remain the source of truth for the setting, update health_status_code in terraform.tfvars to 503, then run:
terraform apply -var-file="terraform.tfvars"
/healthz endpoint will return:{
"status": "Unhealthy",
"statusCode": 503,
"timestampUtc": "2026-04-23T12:00:00.000Z"
}
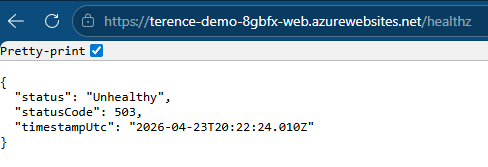
503 Service Unavailable response and mark the backend as unhealthy after hitting the configured unhealthy threshold.To restore it, set health_status_code back to 200 in terraform.tfvars and run:
terraform apply -var-file="terraform.tfvars"

HEALTH_STATUS_CODE.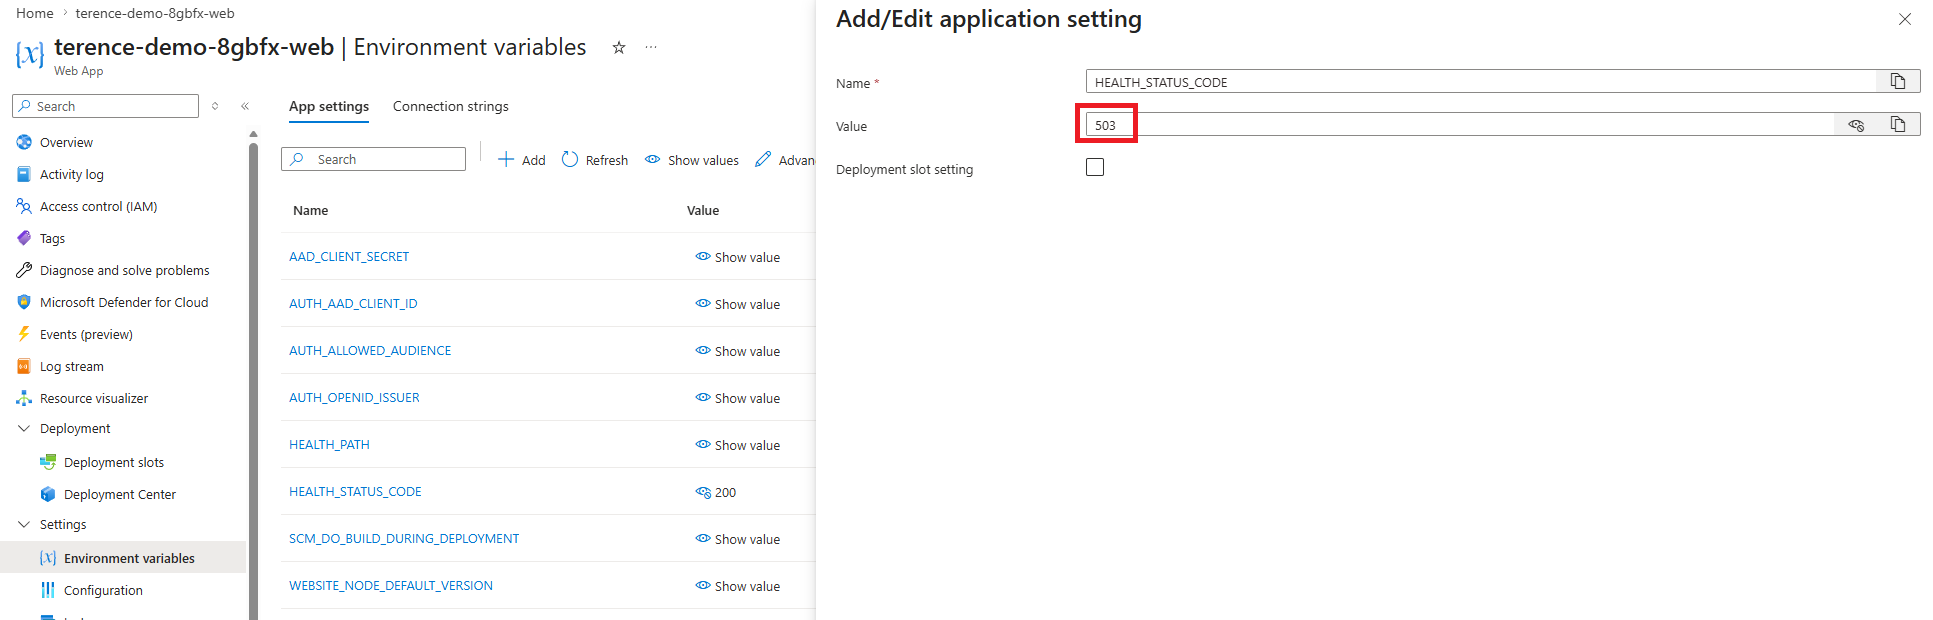
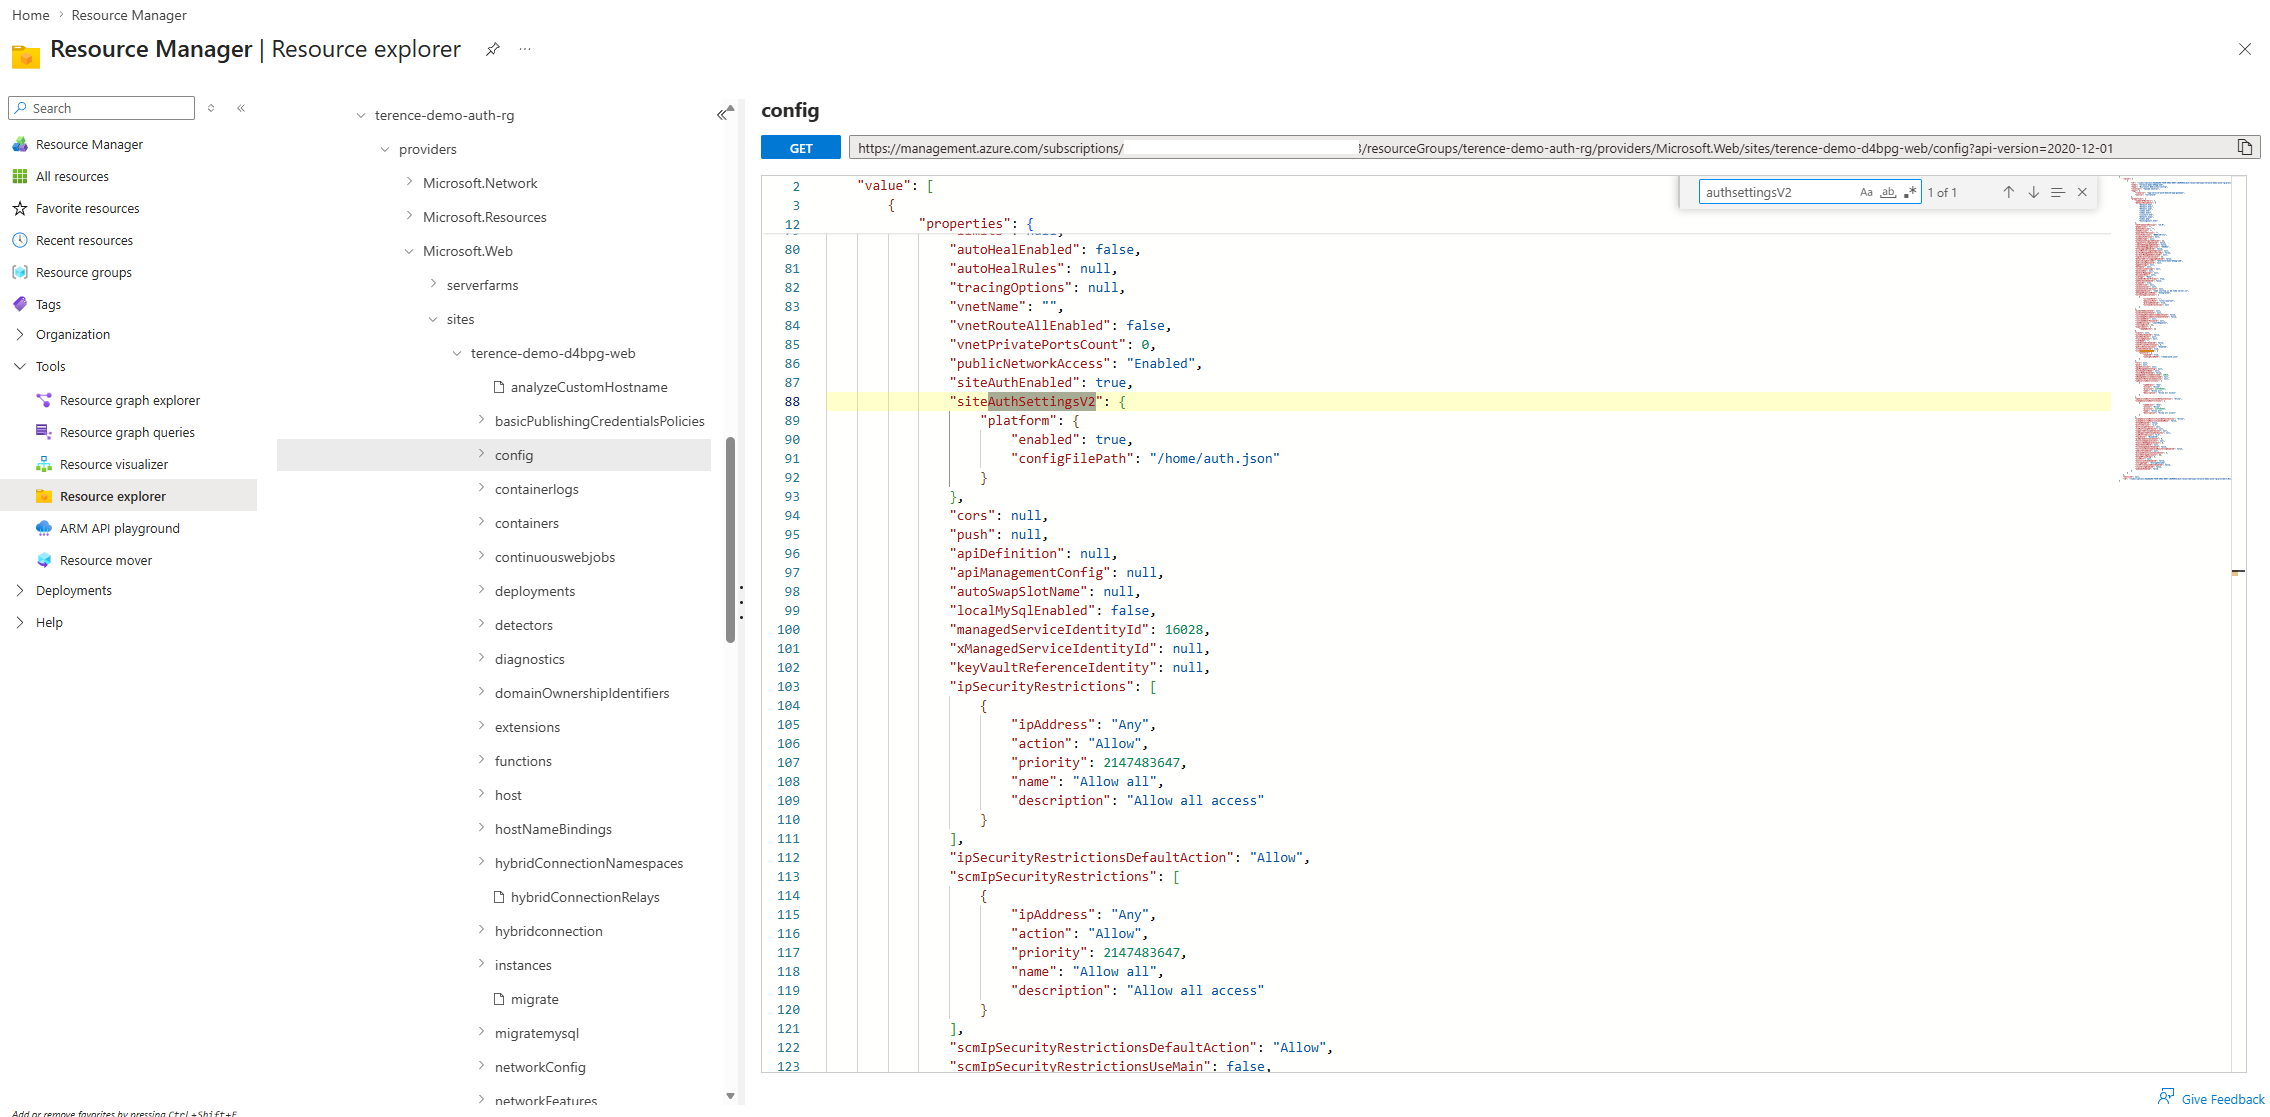
Step 6: Editing the Authentication Configuration Without Terraform Using Azure Resource Explorer
The Terraform configuration is the primary way to manage the deployment, but you may want to inspect or adjust the authsettingsV2 configuration directly in the portal. For example, to verify what was deployed or to make a quick change to the excluded paths without a full redeploy.
The cleanest way to do this is through Azure Resource Explorer, which gives direct access to the Azure Resource Manager API for any resource in your subscription.
Step 6.1: Open Azure Resource Explorer
Navigate to https://resources.azure.com and sign in with your Azure credentials.
Step 6.2: Find Your Web App’s Authentication Configuration
Expand the tree on the left in this order:
- subscriptions → your subscription name
- resourceGroups → your resource group (it will start with
terence-demo-) - providers → Microsoft.Web
- sites → your web app name
- config → authsettingsV2
Step 6.3: Switch to Read/Write Mode
At the top of the page, click Read/Write. This enables editing through the REST API. Without this step the interface is read-only.
Step 6.4: Review the Current Configuration
You will see a JSON view of the authsettingsV2 resource. The important part of the response will be inside properties.platform:
{
  "properties": {
    "platform": {
      "enabled": true,
      "configFilePath": "/home/auth.json"
    }
  }
}
configFilePath is set and points to the correct absolute path, the authentication behavior is being read from the file generated by the startup script rather than from authsettingsV2 directly.Step 6.5: Edit the Configuration
Click Edit at the top of the JSON view. You can modify the properties block to add, change, or extend the platform configuration. For example, to reference a different configuration file:
{
  "properties": {
    "platform": {
      "enabled": true,
      "configFilePath": "/home/auth.json"
    }
  }
}

configFilePath to an empty string or remove the property:{
"properties": {
"platform": {
"enabled": true,
"configFilePath": null
}
}
}
Click PUT at the top of the editor to submit the change through the REST API. The update takes effect within a few seconds and does not require an App Service restart.
Note: Changes made in Azure Resource Explorer will be overwritten the next time you run
terraform apply, because Terraform owns theauthsettingsV2resource. Use Resource Explorer for inspection and temporary changes; keep Terraform as the source of truth for persistent configuration.
Deployment Notes
The sample requires a terraform.tfvars file to supply all deployment parameters. Copy terraform.tfvars.example to terraform.tfvars and fill in the values for your environment before running any Terraform commands.
The key parameters to review are:
| Variable | Description |
|---|---|
subscription_id |
Azure subscription to deploy into. |
resource_group_name |
Resource group created for the deployment. |
location |
Azure region, e.g. canadacentral. |
name_prefix |
Short prefix applied to every resource name. |
vnet_address_space |
Address space for the demo VNet. |
application_gateway_subnet_prefixes |
Subnet for the Application Gateway (/24 minimum). |
private_endpoint_subnet_prefixes |
Subnet for the App Service private endpoint. |
app_service_plan_sku |
App Service Plan SKU. B1 is sufficient for the demo. |
app_service_public_network_access_enabled |
Set to true for initial deployment so Terraform can upload the ZIP via Kudu. Change to false and re-apply after a successful deploy to restrict access to the private endpoint only. |
health_status_code |
Status code returned by /healthz. 200 = healthy, 503 = simulates a failing probe. |
application_gateway_min_capacity |
Minimum Application Gateway instance count (autoscale). |
application_gateway_max_capacity |
Maximum Application Gateway instance count (autoscale). |
application_gateway_listener_hostname |
Public DNS hostname for the HTTPS listener. A matching DNS record and certificate are required. |
application_gateway_ssl_certificate_pfx_path |
Absolute path to the PFX certificate on the machine running terraform apply. |
application_gateway_ssl_certificate_pfx_password |
Password protecting the PFX file. |
The deployment also requires permissions to create Azure resources and register applications in Microsoft Entra ID.
Kudu and the Two-Step Deployment
The Terraform provider deploys the application by uploading a ZIP file to the App Service Kudu SCM endpoint (https://<app-name>.scm.azurewebsites.net/api/zipdeploy). This is a standard HTTPS call made from the machine running terraform apply, which is your laptop in this case.
The App Service in this sample is locked down behind a private endpoint, which also makes the Kudu SCM endpoint private. If app_service_public_network_access_enabled is false during the first apply, Terraform cannot reach Kudu and the deploy will fail.
The recommended sequence is:
Step 1 — Initial deploy with public access enabled
Set app_service_public_network_access_enabled = true in terraform.tfvars, then run:
terraform init
terraform plan -var-file="terraform.tfvars"
terraform apply -var-file="terraform.tfvars"
Step 2 — Lock down public access
Once the deployment is confirmed working, change app_service_public_network_access_enabled to false in terraform.tfvars and run:
terraform apply -var-file="terraform.tfvars"
Re-deploying after lockdown. If you later modify
src/web/files and runterraform apply, the ZIP upload through Kudu will fail because Kudu is now private. Temporarily setapp_service_public_network_access_enabled = true, apply, then set it back tofalseand apply again.
After deployment, capture the following for the blog post if you want to include screenshots:
- The Application Gateway backend health page showing the backend as healthy.
- The App Service Authentication configuration reference through
authsettingsV2. - A browser session showing authentication for
/. - A browser or curl session showing a successful anonymous response from
/healthz.
Closing Thoughts
The interesting part about this issue is that nothing is actually broken when the first 502 appears. The application is protected exactly as intended. What breaks is the assumption that the health probe can continue to use the same path it used before authentication was introduced.
File-based App Service Authentication configuration provides a clean way to solve the problem because it lets us preserve strong authentication for the application while carving out a very narrow anonymous path for platform health checks.
If you need to publish an authenticated App Service through Application Gateway, this is the pattern I would start with.