In my previous post:
Monitor and Alerting for an Azure Virtual Machine with Azure Monitor
Terence Luk: Monitor and Alerting for an Azure Virtual Machine with Azure Monitor
I demonstrated how to set up Log Analytics to monitor the event log for a system event ID 7031 with a specific string that represents a Windows Service we wanted to monitor for and detect if it stops. While this method is certainly a viable option, it isn’t very straight forward if you’re not familiar with Windows and do not know what system events are triggered when a service stops. Case in point, when a service is abruptly terminated, an event ID 7031 error is logged but if the service is gracefully stopped, the event logged will be a 7036 information. Having to capture all types of events with a query leaves a lot of room for error so I would like to demonstrate a different method for monitoring Windows or Linux services.
The Azure feature I typically use to monitor services from within a virtual machine is Change Tracking and Inventory in Azure Automation. This feature tracks changes in virtual machines hosted in Azure, on-premises, and other cloud environments. Items that are tracked by Change Tracking and Inventory include:
- Windows software
- Linux software (packages)
- Windows and Linux files
- Windows registry keys
- Windows services
- Linux daemons
Change Tracking and Inventory overview
https://docs.microsoft.com/en-us/azure/automation/change-tracking/overview
I find this feature extremely powerful and opens up many monitoring opportunities for all sorts of use cases. For the purpose of this example, we’ll use it to monitor Windows service status.
Creating an Automation Account
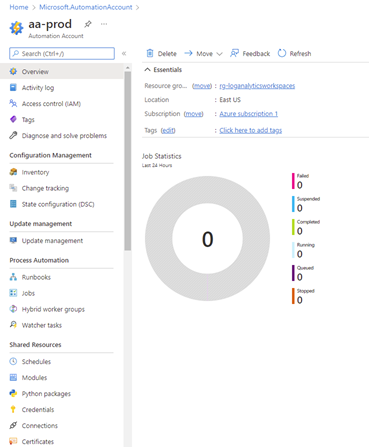
The Change Tracking and Inventory is a feature of Azure Automation and you’ll therefore need to create an Automation account that is linked to a Log Analytics workspace. Begin by navigate to Automation Accounts:
Then create an automation account:
Enabling Change Tracking for the Automation Account
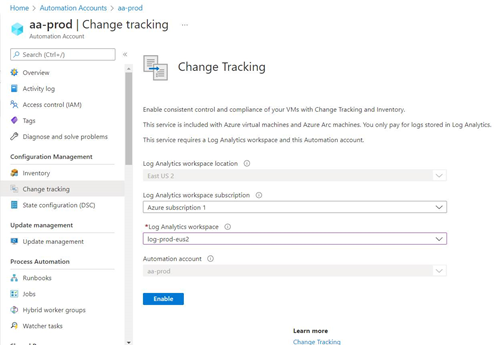
Navigate to Configuration Management > Change Tracking, select a supported Log Analytics workspace, then click Enable:
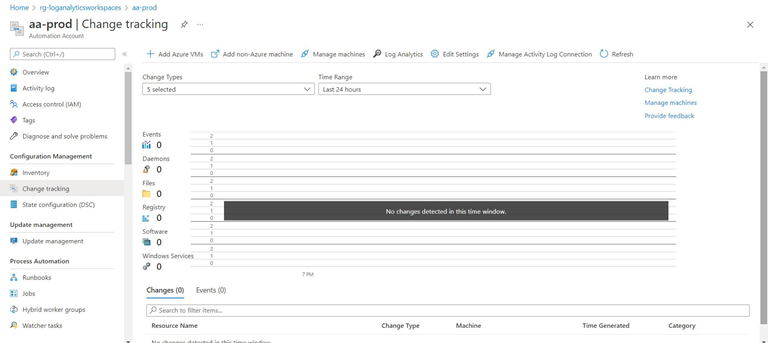
The following console will be displayed once the deployment has successfully completed:
Adding VMs for Change Tracking
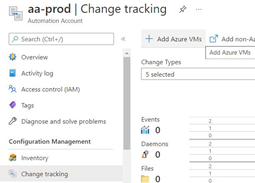
With Change Tracking ready in the Automation Account, proceed to add the VMs:
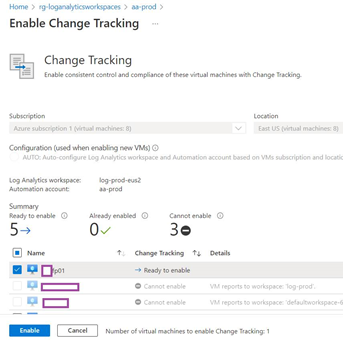
Select the virtual machine(s) you would like to enable Change Tracking and then click Enable:
With the virtual machine added, proceed to adjust the settings by clicking on Edit Settings:
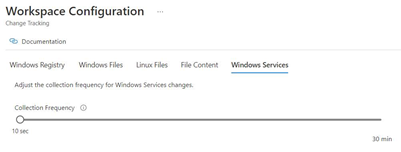
Navigate to Windows Services and note how the frequency is set to 30 minutes:
This is likely not frequent enough and for the purpose of this example, we’ll use the lowest frequency of 10 seconds to collect the Windows Services changes:
With the change tracking configured, proceed to stop the service you intend to test with:
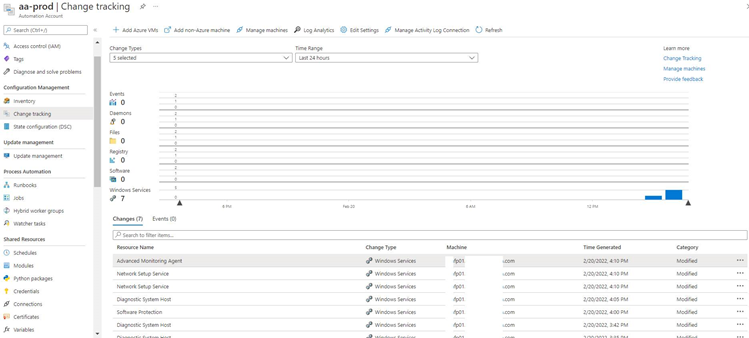
Refresh the Change tracking console and you should see the Windows Services change logged:
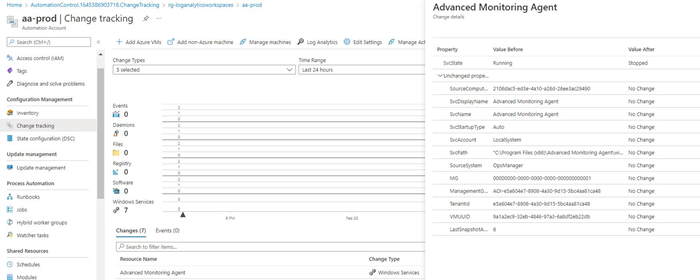
Note the details for the Advanced Monitoring Agent service we stopped:
Proceed to click on the Log Analytics button:
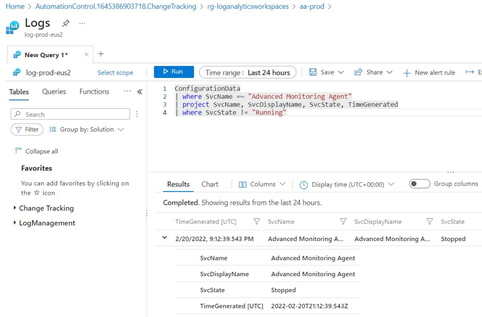
The query window will automatically execute the ConfigurationChange query without any other requirements, which will provide all results for any configuration change. We’ll refine it to only list the service we want to track:
ConfigurationData
| where SvcName =~ “Advanced Monitoring Agent”
| project SvcName, SvcDisplayName, SvcState, TimeGenerated
| where SvcState != “Running”
Now that we have a query to search for a specific service, we can create a new alert by clicking the New alert rule button:
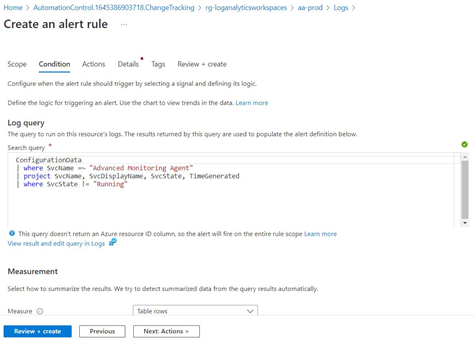
Proceed to configure the Condition settings:
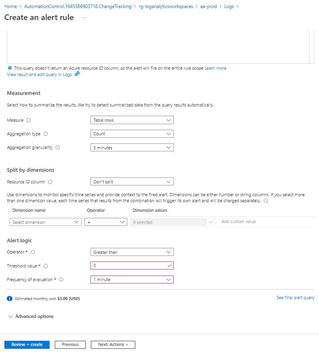
Update the Threshold value to 0 and Frequency of evaluation to 1 minute to capture any service status that is not “Running”:
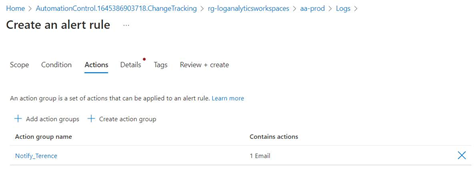
Select an action group for the notification:
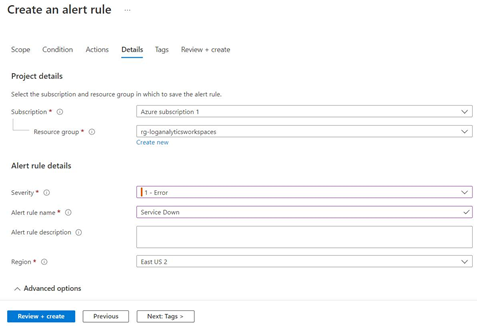
Fill in the details for the rule:
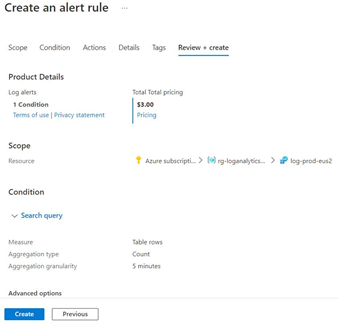
Complete creating the rule:
As with all rules, it may take a bit of time before it shows up in the console:
Note that although the rule was created within the Automation Account, it is actually configured and associated with the Log Analytics Workspace of the Automation Account:
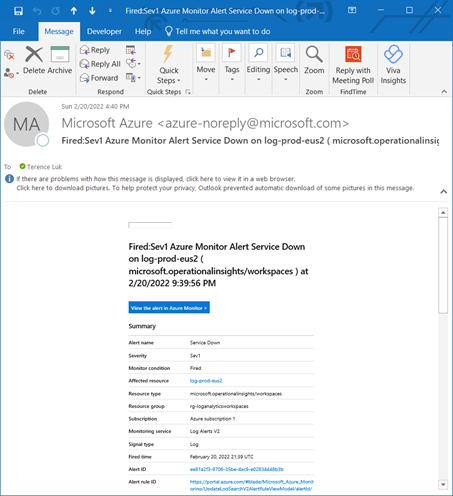
Proceed to test stopping the monitored service and you should see an email notification similar to the one below:
Hope this provides a good overview of how to use Change Tracking and Inventory to monitor Windows Services. What’s great about this feature is that it allows you to track other changes such as file and registry, which opens up so many possibilities for monitoring.


